

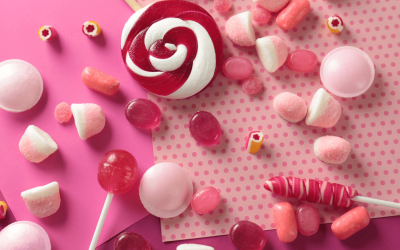
Making chocolate candy at home is a delightful adventure that combines creativity with sweet rewards. Whether you’re preparing treats for a special occasion or simply indulging your sweet tooth, this comprehensive guide will walk you through everything you need to know about crafting delicious chocolate candies in your own kitchen.
Before diving into the exciting world of making chocolate candy, it’s crucial to gather the fundamental tools and ingredients that will ensure your success. Here’s a comprehensive list of what you’ll need:
- Double boiler or microwave-safe bowl: These tools are essential for melting chocolate without burning it. A double boiler provides gentle heat, while a microwave-safe bowl allows for quick melting in short bursts.
- Candy thermometer: This handy device helps you monitor the temperature of the chocolate to achieve perfect melting and tempering, ensuring a smooth texture.
- Silicone molds: Ideal for shaping your chocolates into fun designs, silicone molds make it easy to pop out your creations once they’re set. They come in various shapes and sizes, allowing for creativity in your making chocolate candy projects.
- Parchment paper: This kitchen staple keeps your workspace clean and prevents your candies from sticking to surfaces while cooling.
- Spatulas and spoons: Useful for mixing, transferring chocolate, and spreading it evenly in molds. Silicone spatulas are particularly effective because they don’t scratch your molds.
- Quality chocolate: Choose from dark, milk, or white chocolate based on your preference. High-quality chocolate will significantly enhance the flavour of your candy, making your efforts in making chocolate candy worthwhile.
- Optional add-ins: Consider using nuts, dried fruits, flavouring oils, or even sprinkles to enhance your creations. These add-ins can elevate your chocolate candy, adding texture and flavour complexity.
The Art of Tempering Chocolate
The secret to creating professional-looking chocolate candy lies in the proper technique of tempering. Tempering stabilizes the cocoa butter crystals in chocolate, resulting in a glossy finish and satisfying snap. Here’s a simplified method to get you started:
- Chop your chocolate into small, uniform pieces: This helps it melt evenly and ensures that all pieces reach the desired temperature.
- Melt 2/3 of the chocolate: Use a double boiler or microwave, heating it to 115°F for dark chocolate or 110°F for milk and white chocolate. This initial heating is critical for the melting process.
- Add the remaining chocolate gradually while stirring: This process cools the melted chocolate and encourages the formation of stable cocoa butter crystals.
- Continue stirring until the chocolate reaches 88-90°F for dark chocolate or 86-88°F for milk/white chocolate: Your chocolate is now tempered and ready for making chocolate candy!
Creating Your Chocolate Candy
Once your chocolate is properly tempered, it’s time to unleash your creativity! Here’s how to make your chocolate candy:
Step-by-Step Instructions
- Prepare your molds: Ensure your silicone molds are clean and dry to facilitate easy removal after the chocolate sets.
- Pour tempered chocolate into molds: Fill them to the desired height, tapping the mold gently to release any trapped air bubbles. This step is crucial for achieving a smooth surface.
- Add any fillings or toppings: If you’re using nuts, dried fruits, or other add-ins, sprinkle them on top or mix them into the chocolate before it sets. This not only adds flavor but also enhances the visual appeal of your candies.
- Chill to set: Place the filled molds in the refrigerator for about 15-30 minutes until the chocolate is firm to the touch. Be patient—this step is essential for perfecting your candy.
- Demold your candies: Gently press on the bottom of the molds to release your chocolate candies. Enjoy the satisfaction of seeing your hard work come to fruition!
Tips for Success
- Use high-quality chocolate: The better the chocolate, the better your candy will taste. Investing in quality chocolate is key to achieving a rich flavour profile in your making chocolate candy endeavours.
- Avoid moisture: Even a tiny amount of water can seize your chocolate, rendering it unusable. Keep all utensils and your workspace dry to prevent this issue.
- Experiment with flavours: Don’t be afraid to get creative! Try adding peppermint oil, orange zest, or sea salt for a unique twist on classic chocolate candies. This experimentation can lead to delightful new combinations and an exciting candy-making experience.
Understanding the Basics of Chocolate
Before embarking on your journey into making chocolate candy, it’s important to understand the different types of chocolate available. Not all chocolate is created equal, and knowing the distinctions will greatly impact the outcome of your candies.
- Dark chocolate: Known for its rich flavour and health benefits, dark chocolate is typically made with cocoa solids, cocoa butter, and sugar, with little to no milk. It has a higher cocoa content, making it ideal for more sophisticated candy flavours.
- Milk chocolate: Creamy and sweet, milk chocolate contains milk solids, which give it a softer taste and texture. It’s perfect for those who enjoy a sweeter candy experience.
- White chocolate: Technically not chocolate, white chocolate is made from cocoa butter, sugar, and milk solids. It lacks cocoa solids, which gives it a different flavor profile. White chocolate can add a lovely contrast when combined with darker chocolates in making chocolate candy.
Types of Chocolate for Candy Making
When it comes to making chocolate candy, you have a variety of chocolate types to choose from. The most commonly used types include:
- Milk chocolate: Known for its creamy and sweet taste, milk chocolate is a popular choice for candy making.
- Dark chocolate: With a higher cocoa content, dark chocolate offers a rich and intense flavour that’s perfect for sophisticated candies.
- White chocolate: Although technically not chocolate in the traditional sense, white chocolate is made from cocoa butter and imparts a luxurious sweetness to your candies.
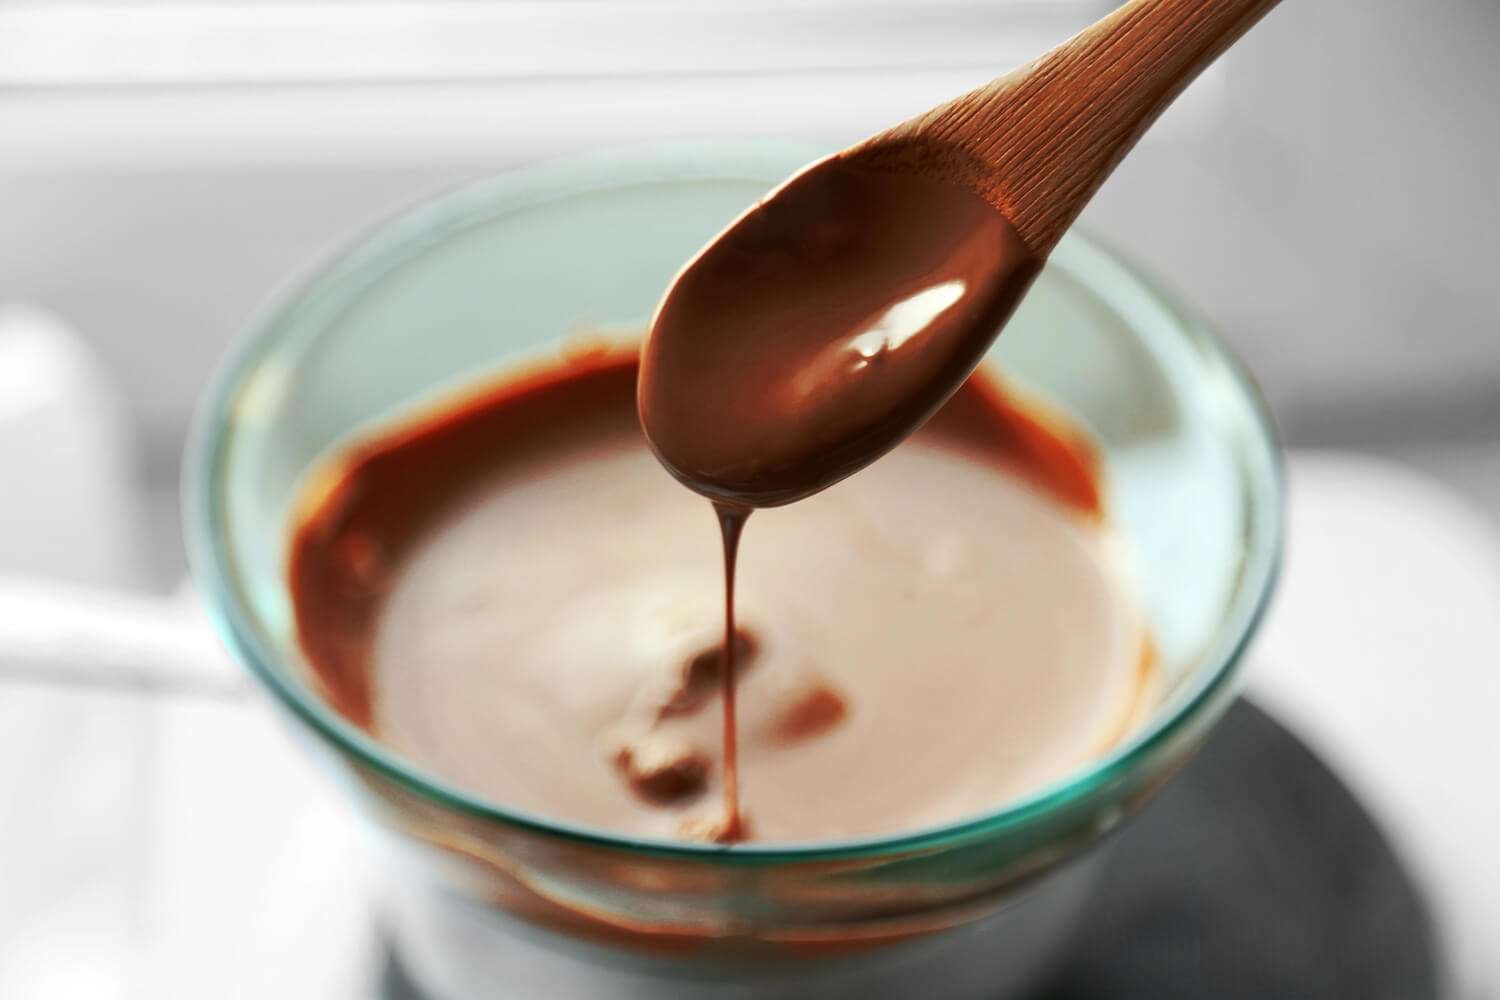
The Science Behind Melting Chocolate
When it comes to making chocolate candy, melting chocolate may seem like a straightforward task, but there’s actually a fascinating science behind it. Chocolate contains cocoa butter, which has a unique melting point that is key to achieving that smooth, glossy finish we all love. Understanding this process can make a significant difference in your chocolate candy creations.
One common method for melting chocolate is using a double boiler. This technique involves placing a heatproof bowl over a pot of simmering water, making sure that the bottom of the bowl doesn’t touch the water. The gentle heat from the steam melts the chocolate gradually, preventing it from being subjected to direct heat, which can scorch or seize it. This method is ideal for making chocolate candy because it allows for precise control over the temperature.
Alternatively, you can melt chocolate in the microwave, which is quick and convenient. However, it’s essential to do this in short bursts—typically 20-30 seconds—stirring frequently in between to ensure even melting. This helps prevent overheating and burning, which can ruin your efforts in making chocolate candy.
Health Benefits of Chocolate
Indulging in chocolate candy can not only satisfy your sweet cravings but may also offer some surprising health benefits. Dark chocolate, in particular, is renowned for its antioxidant properties and potential cardiovascular benefits. Studies suggest that moderate consumption of dark chocolate can improve heart health by lowering blood pressure and improving blood flow. However, moderation is key, as excessive consumption can lead to weight gain and other health issues.
Beyond its health perks, chocolate has a rich history that spans centuries. The ancient Mayans and Aztecs were among the first to cultivate and consume chocolate, believing it had divine properties. They used it in religious ceremonies and even as currency, highlighting the cultural significance of chocolate long before it became a popular ingredient in making chocolate candy.
During the 16th century, Spanish explorers introduced chocolate to Europe, where it quickly gained popularity among the nobility as a luxurious treat. The invention of the cocoa press in the 19th century revolutionised chocolate production, making it more accessible to the masses and paving the way for the diverse chocolate products we enjoy today.
Today, chocolate is enjoyed in countless forms and flavours across the globe. From artisanal truffles to chocolate bars infused with unique ingredients like chilli or sea salt, the options are endless. Whether you’re making chocolate candy for a special occasion or just indulging in a sweet treat, there’s something for everyone in the world of chocolate.
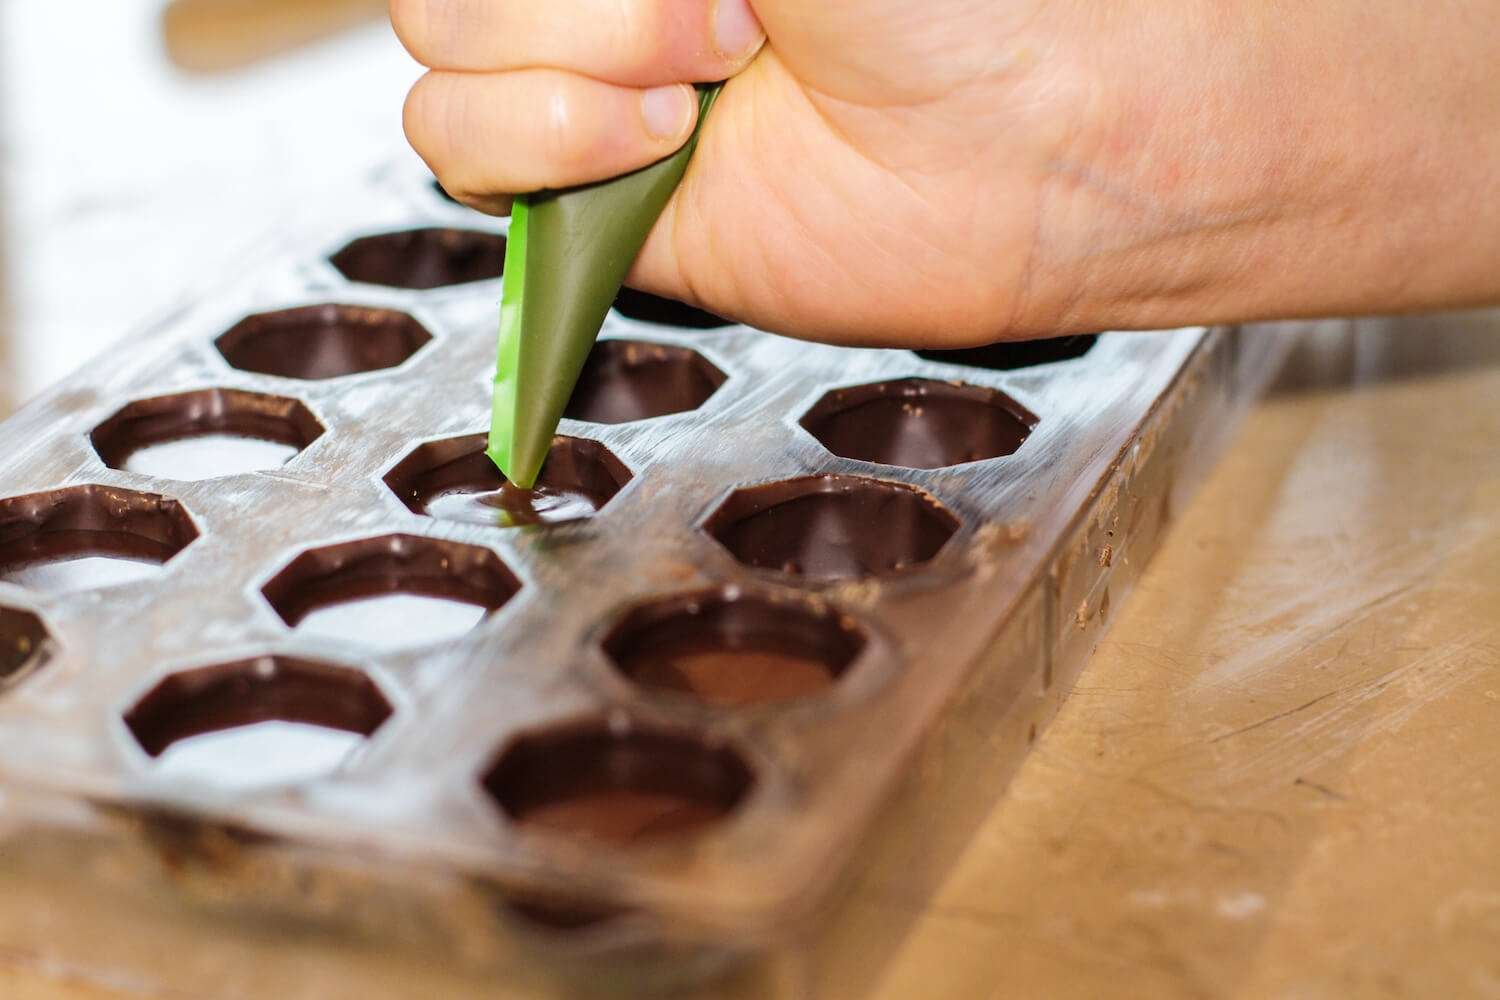
Moulding and Setting Your Chocolate Candy
Once your chocolate is ready, it’s time for the exciting part: making chocolate candy by moulding and setting your creations. Start by selecting your desired moulds, which can vary from simple squares to intricate shapes like hearts or animals. Fill your chosen moulds with the melted chocolate using a spoon or a piping bag for added precision. A piping bag is particularly useful for intricate designs, allowing you to control the flow of chocolate and fill every nook and cranny of the mould.
To ensure an even distribution of chocolate and eliminate air bubbles, gently tap the moulds on the countertop. This step is crucial, as air bubbles can compromise the appearance and texture of your finished chocolates. By tapping, you allow the chocolate to settle and fill any voids, resulting in a more polished end product.
Experimenting with Moulds
One of the joys of making chocolate candy at home is the opportunity to experiment with different moulds. Silicone moulds are especially popular due to their flexibility, which allows for easy release of the chocolates without any breakage. Unlike traditional plastic moulds, silicone can bend and flex, making it simple to pop out your creations once they’ve set.
Feel free to get creative by adding fillings to your chocolates. Consider incorporating nuts, caramel, or dried fruits for an extra layer of flavour and texture. For instance, a creamy caramel filling paired with dark chocolate creates a delightful contrast, while crunchy nuts add a satisfying bite. When adding fillings, pour a layer of chocolate into the mould first, allow it to set slightly, then add your fillings and cover them with more melted chocolate. This method ensures that your fillings are well-encased in chocolate, providing a surprise with each bite.
Setting the Chocolate
After filling your moulds, it’s essential to allow the chocolate to set properly. You can leave the moulds at room temperature until the chocolate firms up, which may take anywhere from 20 minutes to a couple of hours, depending on the room temperature and the thickness of the chocolate. For quicker results, you can place the moulds in the refrigerator for about 10-15 minutes. However, be patient during this step; rushing the process and unmolding too soon could lead to disastrous results, such as broken or misshapen chocolates.
To check if the chocolate has set properly, gently press the back of the mould. If it feels firm and there’s no give, it’s time to unmould your chocolates. If not, give them a bit more time to solidify. This waiting period is crucial for achieving that professional finish you desire in your homemade chocolates.
Importance of a Candy Thermometer
A candy thermometer is indispensable when working with chocolate, especially during the making chocolate candy process. It enables you to monitor the temperature accurately, ensuring your chocolate reaches the desired consistency. Different types of chocolate require specific tempering temperatures for optimal results, and a candy thermometer provides the precision necessary for successful tempering.
Tempering chocolate is a delicate process that involves heating and cooling the chocolate to specific temperatures to achieve a smooth, glossy finish. For dark chocolate, the initial melting temperature should reach about 115°F (46°C), while milk and white chocolate should melt to around 110°F (43°C). After melting, the chocolate must be cooled down to about 88-90°F (31-32°C) for dark chocolate and 86-88°F (30-31°C) for milk and white chocolate. A candy thermometer takes the guesswork out of this process, allowing you to have precise control over the chocolate’s texture and shine.
Using a candy thermometer not only ensures the perfect temper but also helps you avoid common pitfalls, such as overheating the chocolate, which can lead to a burnt taste and undesirable texture. By investing in a reliable candy thermometer, you elevate your making chocolate candy experience, resulting in beautifully tempered chocolate that tastes as good as it looks.
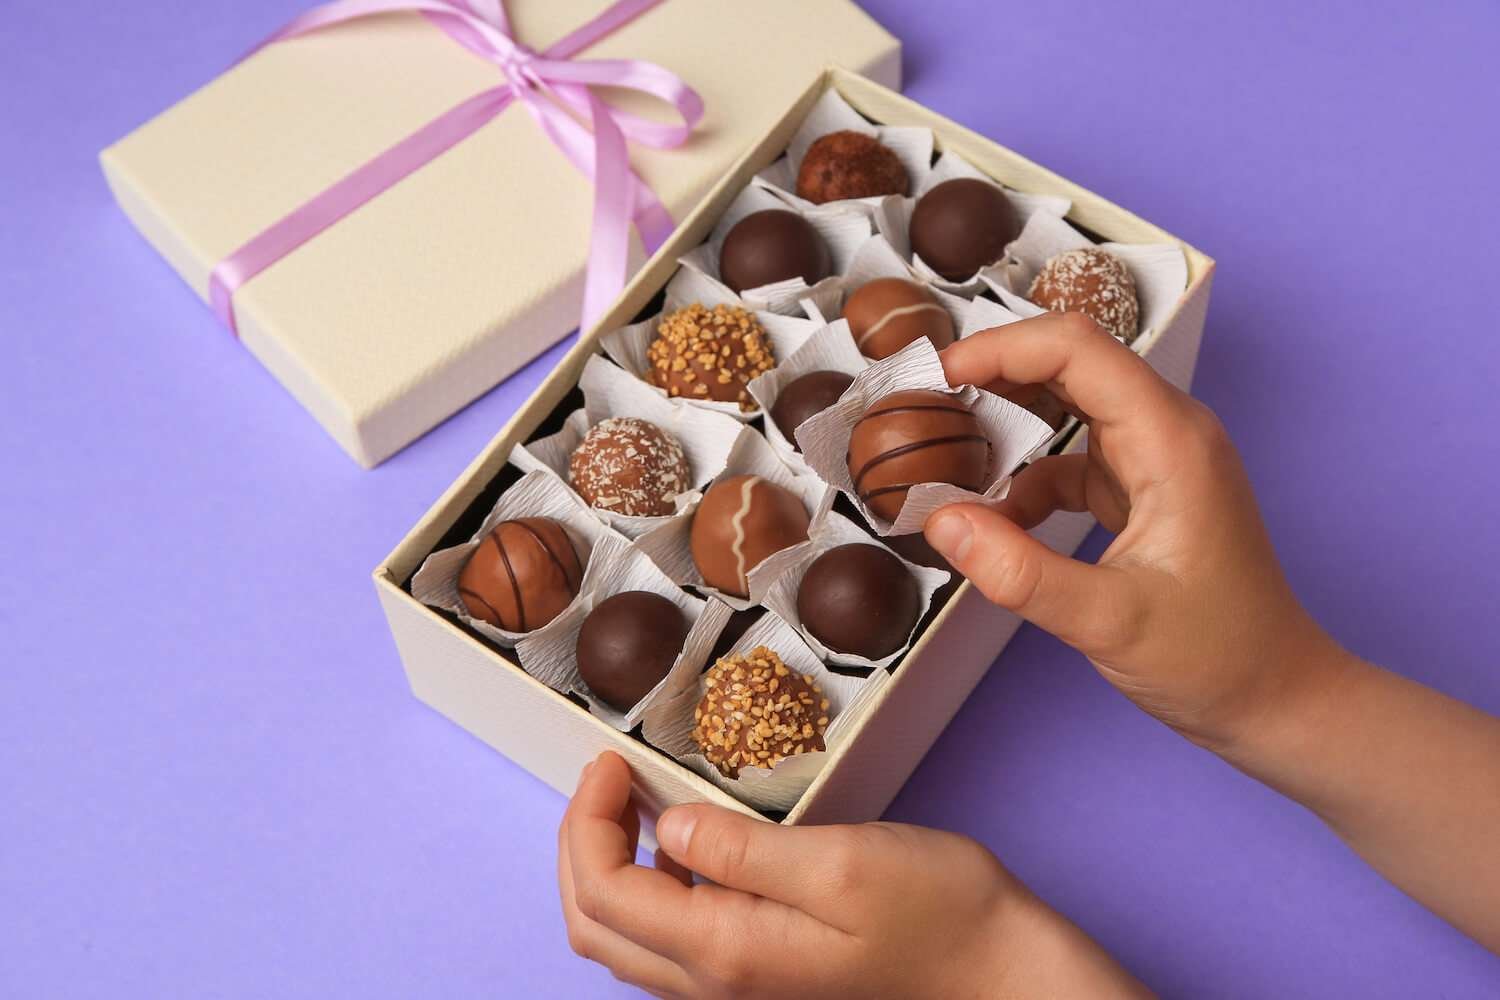
Packaging and Storing Your Chocolate Candy
Once your chocolate candies have set, it’s essential to package them properly for gifting or storing. Making chocolate candy is not just about the delicious treats themselves; presentation plays a significant role in enhancing the overall experience. Here are some tips to ensure your homemade chocolates are preserved and presented beautifully:
- Individual Wrapping: Wrap each chocolate candy in parchment paper or foil. This not only keeps them fresh but also adds a touch of elegance. Consider placing them in decorative boxes or jars that reflect the occasion, whether it’s a festive holiday or a heartfelt gift.
- Cool, Dry Storage: Store your packaged chocolates in a cool, dry place away from direct sunlight. Avoid areas with fluctuating temperatures, such as near the oven or in a sunny window, as these can cause your chocolates to lose their texture and flavour.
- Personalised Touch: Add a personal touch to your chocolate candy packaging. Tie them with colourful ribbons, attach handwritten notes, or include labels that describe the flavours. Personalisation can transform your homemade chocolates into heartfelt gifts that resonate with the recipients.
- Shelf Life Awareness: Remember that chocolates are best consumed within a few weeks for optimal flavour and texture. The longer they sit, the more they may lose their freshness. If you plan to store them longer, consider freezing them, but be sure to wrap them tightly to prevent freezer burn.
Exploring Different Chocolate Candy Recipes
Now that you have mastered the basics of making chocolate candy, it’s time to get creative with different recipes that will tantalize your taste buds. Here are a few delicious options to satiate your chocolate cravings:
Classic Chocolate Truffles
Indulge in the velvety richness of homemade chocolate truffles. These bite-sized delights are made by combining ganache—a mixture of chocolate and cream—and rolling them in cocoa powder, nuts, or other desired coatings. When making chocolate candy like truffles, you can customise your creations by adding various flavours such as coffee, liqueurs, or spices. Imagine the satisfaction of crafting your unique truffle flavour combinations!
Chocolate Covered Caramels
Elevate the classic caramel by enrobing it in luscious melted chocolate. The delightful contrast of sweet, creamy caramel with the smoothness of chocolate is a match made in heaven. Experiment with different caramel flavours, such as sea salt or vanilla, and pair them with various chocolate types to create your signature candies. This simple yet delicious recipe is perfect for both seasoned candy makers and beginners alike.
Homemade Chocolate Bars
Why settle for store-bought chocolate bars when you can create your own at home? Tailor the sweetness, texture, and add-ins to your liking when making chocolate candy bars. Whether you prefer a simple milk chocolate bar or a sophisticated dark chocolate creation studded with nuts and dried fruits, the possibilities are endless. Get creative with flavours by incorporating spices, fruits, or even herbs!
Decadent Chocolate Truffle Cake
If you’re a fan of both chocolate truffles and cake, this recipe is a dream come true. Imagine sinking your fork into a moist and rich chocolate cake, layered with a velvety smooth truffle filling. The combination of textures and flavours will leave you in awe. Decorate the cake with chocolate curls or a dusting of cocoa powder for an elegant finish. This decadent dessert is a showstopper for any gathering.
Chocolate Peanut Butter Cups
Indulge in the classic combination of chocolate and peanut butter with these homemade treats. When making chocolate candy, create a luscious peanut butter filling and encase it in a shell of melted chocolate. The moment you take a bite, you’ll experience the perfect balance of sweet and salty, smooth and creamy. These bite-sized delights are perfect for sharing or enjoying all by yourself, making them a favourite among chocolate lovers.
Chocolate Bark
For a quick and easy chocolate candy option, try making chocolate bark. Simply melt your favourite chocolate, spread it onto a parchment-lined baking sheet, and sprinkle with toppings like nuts, dried fruits, or even crushed cookies. Once set, break it into pieces for a delightful snack or gift. This recipe is incredibly versatile and allows you to experiment with various combinations when making chocolate candy.
With these delectable recipes, you can unleash your creativity and enjoy the satisfaction of crafting your very own chocolate candies. Whether you’re celebrating a special occasion or just treating yourself, making chocolate candy is an enjoyable and rewarding experience.
Now that you have all the knowledge and resources at your disposal, it’s time to start your chocolate candy making adventure. Gather your ingredients, don your apron, and let your imagination run wild with delicious possibilities!
There’s nothing quite like the joy of making chocolate candy—visit bbb.aykay.co/blog for more delightful baking tips!

About the Author
Kaylene Grieve, a passionate baker and culinary educator, carries on a rich family legacy in the world of pastries and confections that began with her grandfather’s successful bakery. With over two decades of experience in business and marketing, Kaylene combines her baking heritage with digital expertise as the founder of Bake Batter & Beyond. This comprehensive baking resource reflects her mission to make the joy and science of baking accessible to all.
Dedicated to empowering both novice and experienced bakers, Kaylene’s website offers practical knowledge and tools including measurement converters, substitution guides, troubleshooting tips, and baking rescue techniques. Her special focus on the intricate world of cake making, coupled with her unique blend of family tradition and modern savvy, has established Kaylene as a trusted voice in the baking community.
0 Comments