

Indulging in the rich and decadent world of chocolate candy making is a delight for both the amateur and seasoned sweet-tooth. Whether it’s moulding cute little truffles or crafting irresistible chocolate bark, creating your very own confections is a rewarding and creative endeavour. To help you on your path to chocolaty bliss, this ultimate guide will take you through everything you need to know about making mouthwatering chocolate candies. From understanding the basics of chocolate to mastering the art of decoration, let’s dive right in!
Understanding the Basics of Chocolate Candy Making
To embark on your chocolate candy-making adventure, it’s essential to understand the basics of chocolate. Before we delve into the details of the candy making process, let’s explore the different types of chocolate that are commonly used.
Types of Chocolate for Candy Making
When it comes to chocolate, there are various options to choose from for chocolate candy making. Each type has its own unique characteristics, flavours, and melting properties, making it essential to select the right one for your confectionery creations. The most common types of chocolate used for candy making include:
Milk Chocolate
Milk chocolate is a popular choice for chocolate candy making due to its creamy texture and sweet flavour. It contains milk solids, which contribute to its smoothness and rich taste, making it ideal for a variety of candies, from bars to truffles.
Dark Chocolate
Dark chocolate is known for its rich, intense flavour and higher cocoa content, which can vary from 50% to 90%. This type of chocolate is less sweet than milk chocolate and provides a sophisticated taste, making it perfect for gourmet chocolate candy making. It also pairs well with other flavours and can be used in a variety of recipes.
White Chocolate
Though technically not chocolate, as it doesn’t contain cocoa solids, white chocolate is another popular option for chocolate candy making. It is made from cocoa butter, sugar, and milk solids, offering a sweet, creamy taste that complements various fillings and toppings. Its versatility allows it to be used in everything from dipping to decorative elements.
Each type of chocolate offers a different flavour profile and intensity, allowing you to create a variety of delectable treats in your chocolate candy making ventures. Knowing which type to use for specific candies will help you achieve the perfect balance of taste and texture, enhancing your overall candy-making experience.
Essential Tools for Chocolate Candy Making
Before diving into the chocolate melting process, it’s important to ensure you have the necessary tools and equipment. Here are some essential tools that every aspiring chocolate candy maker should have:
- Double boiler or microwave-safe bowl
- Spatula or whisk
- Candy moulds
- Offset spatula
- Parchment paper
- Candy thermometers
Having these tools on hand will make the entire candy making process much more efficient and enjoyable. Now that you have a grasp of the basics, let’s delve into the science behind melting chocolate.
The Science Behind Melting Chocolate
Melting chocolate may seem like a straightforward process, but understanding the underlying science will help you achieve the perfect consistency and texture, which is essential for chocolate candy making. When chocolate is heated, its cocoa butter crystals begin to melt, resulting in a smooth and liquid form. However, it’s crucial to keep in mind that chocolate is extremely sensitive to heat. Overheating can cause the chocolate to burn or seize, creating a grainy and unappetising texture, which is the last thing you want when embarking on your chocolate candy making journey.
Properly melting chocolate requires careful attention to temperature and technique. Whether you choose to use a double boiler or a microwave, maintaining gentle and gradual heat is key to achieving the desired results. Let’s explore the different methods of melting chocolate that can enhance your chocolate candy making skills.
One popular method of melting chocolate is using a double boiler. This involves placing a heatproof bowl containing the chocolate over a pot of simmering water. The steam from the water gently heats the bowl, melting the chocolate without direct exposure to high heat. This method allows for precise control over the temperature and helps prevent overheating, which is vital for successful chocolate candy making.
If you prefer a quicker method, you can use a microwave-safe bowl to melt the chocolate in short bursts. Start by microwaving the chocolate at a low power setting for 30 seconds, then stir. Repeat this process until the chocolate is almost completely melted, then continue stirring until it becomes smooth and glossy. Be cautious not to overheat the chocolate, as microwaves can vary in power and intensity, impacting your chocolate candy making results.
Regardless of the method you choose, it’s important to stir the chocolate frequently during the melting process. This helps distribute the heat evenly and prevents any hot spots from forming, which could ruin your chocolate candy making efforts. It’s also crucial to avoid introducing any moisture into the chocolate, as even a small amount can cause it to seize and become lumpy.
Now that you have a better understanding of the science behind melting chocolate, you’re ready to embark on your candy-making journey!
Tempering Chocolate for a Glossy Finish
Tempering chocolate is an essential step in achieving a glossy and professional-looking finish for your candies, making it a crucial skill in chocolate candy making. Tempering involves the careful manipulation of the chocolate’s temperature to encourage the formation of stable cocoa butter crystals.
There are various methods for tempering chocolate, such as:
The Seeding Method
Chocolate seeding is a technique used in the tempering process to stabilise chocolate, ensuring it sets with a glossy finish and a firm snap. The method involves melting a portion of chocolate, then adding unmelted, finely chopped chocolate pieces to the mix. These unmelted pieces are referred to as “seeds.”
As the seeds are stirred into the melted chocolate, they gradually melt and help cool the mixture down evenly. This process encourages the formation of stable cocoa butter crystals, which are crucial for properly tempered chocolate. By controlling the temperature and ensuring the chocolate doesn’t get too hot, the seeding method helps produce smooth, shiny chocolate that sets well at room temperature and has a good texture. This technique is particularly useful for making candies, coatings, and chocolate decorations that require a beautiful gloss and snap when broken, making it indispensable in chocolate candy making.
The Tabliering Method
The tabliering method, also known as the “table” or “marble slab” method, is a traditional technique used for tempering chocolate, making it essential in the world of chocolate candy making. This method involves manually cooling and working the melted chocolate on a cold surface, typically a marble slab, to stabilise it and encourage the formation of desirable cocoa butter crystals.
Here’s how the tabliering method works in the context of chocolate candy making:
- Melting: The chocolate is first melted using controlled heat to ensure it reaches a uniform temperature that melts all cocoa butter crystals.
- Pouring and Cooling: The melted chocolate is then poured onto a cold marble slab. The cool surface helps to reduce the chocolate’s temperature quickly, which is crucial for successful chocolate candy making.
- Agitation: Using a spatula or scraper, the chocolate is spread, pooled, and continuously moved around on the slab. This agitation promotes the formation of stable crystalline forms of cocoa butter, essential for creating high-quality candies.
- Reheating: Once the chocolate has cooled and thickened on the slab, it’s scooped up and placed back into a container where it is gently reheated to working temperature. This process makes it fluid enough for dipping or coating, further enhancing your chocolate candy making experience.
The tabliering method is valued for its precision and the quality of tempered chocolate it produces, which is ideal for achieving a glossy finish and a firm, satisfying snap in your candy creations. However, it requires skill and is labour-intensive, making it less common for casual or home chocolate makers compared to simpler methods like seeding.
Now that your chocolate is perfectly melted and tempered, it’s time to explore the art of adding flavours and textures to your creations, taking your chocolate candy making to the next level!
Adding Flavours and Textures to Your Chocolate
While chocolate alone is a treat in itself, adding flavours and textures can take your chocolate candy making creations to the next level. Here are a few creative ways to enhance your chocolate candies:
- Infuse your chocolate with spices, such as cinnamon or chilli powder, or flavourings like lemon or orange.
- Add a splash of liqueur or extracts, such as vanilla or peppermint, for a burst of flavour.
- Mix in various nuts, dried fruits, or crunchy additions like pretzels or cereal.
Experimenting with different flavour combinations will allow you to cater to diverse tastes and create truly unique candy experiences that elevate your chocolate candy making repertoire.

Techniques for Making Chocolate Candies
Now that you have a good grasp of the basics, it’s time to explore various techniques for making chocolate candies. From moulding chocolates to crafting filled centres, the possibilities are endless!
Moulding Chocolate Candies
Moulding chocolates is a classic and versatile technique that allows you to create an array of shapes and designs. Here’s a step-by-step guide to moulding chocolates:
- Fill your clean and dry candy moulds with melted chocolate.
- Tap the moulds gently on the counter to eliminate any air bubbles.
- Place the moulds in the refrigerator or freezer to allow the chocolate to be set.
- Once set, carefully remove the chocolates from the moulds and enjoy!
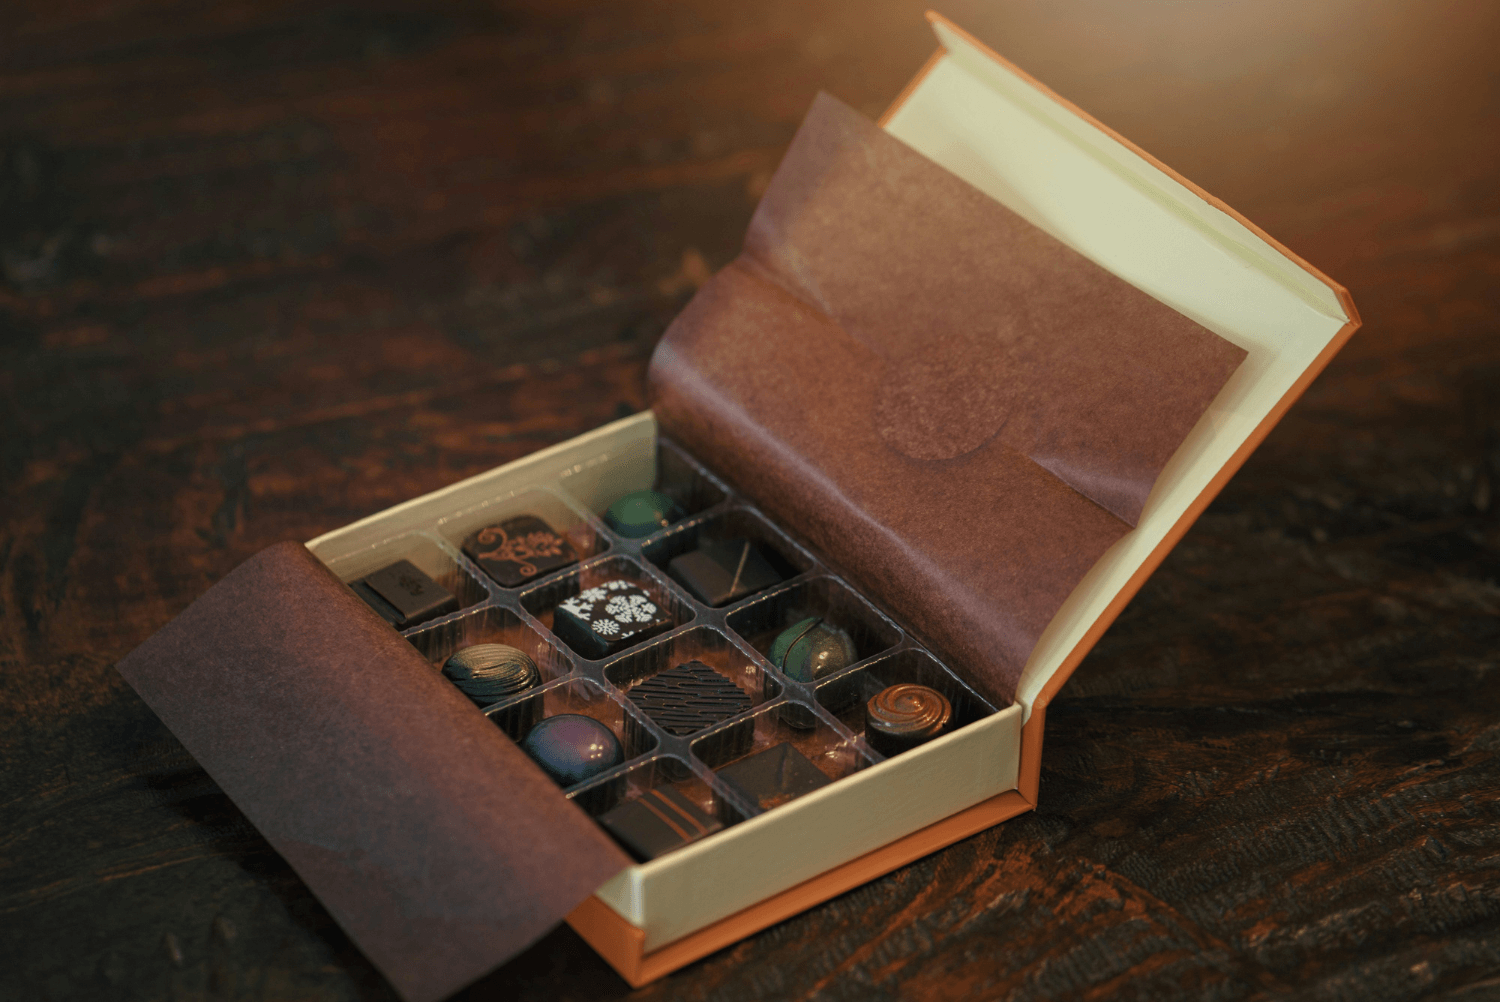
Creating Filled Chocolates
Making filled chocolates adds a delightful surprise to every bite. Here’s a simple method to create filled chocolates:
- Fill the bottom of your chocolate mould with a layer of melted chocolate.
- Add your desired filling, such as caramel, fruit puree, or nougat, into each mould cavity.
- Cover the fillings with more melted chocolate, ensuring they are completely sealed.
- Allow the chocolates to set before removing them from the moulds and savouring the delicious flavours.
The possibilities for fillings are endless, so don’t be afraid to experiment and create your own unique combinations.
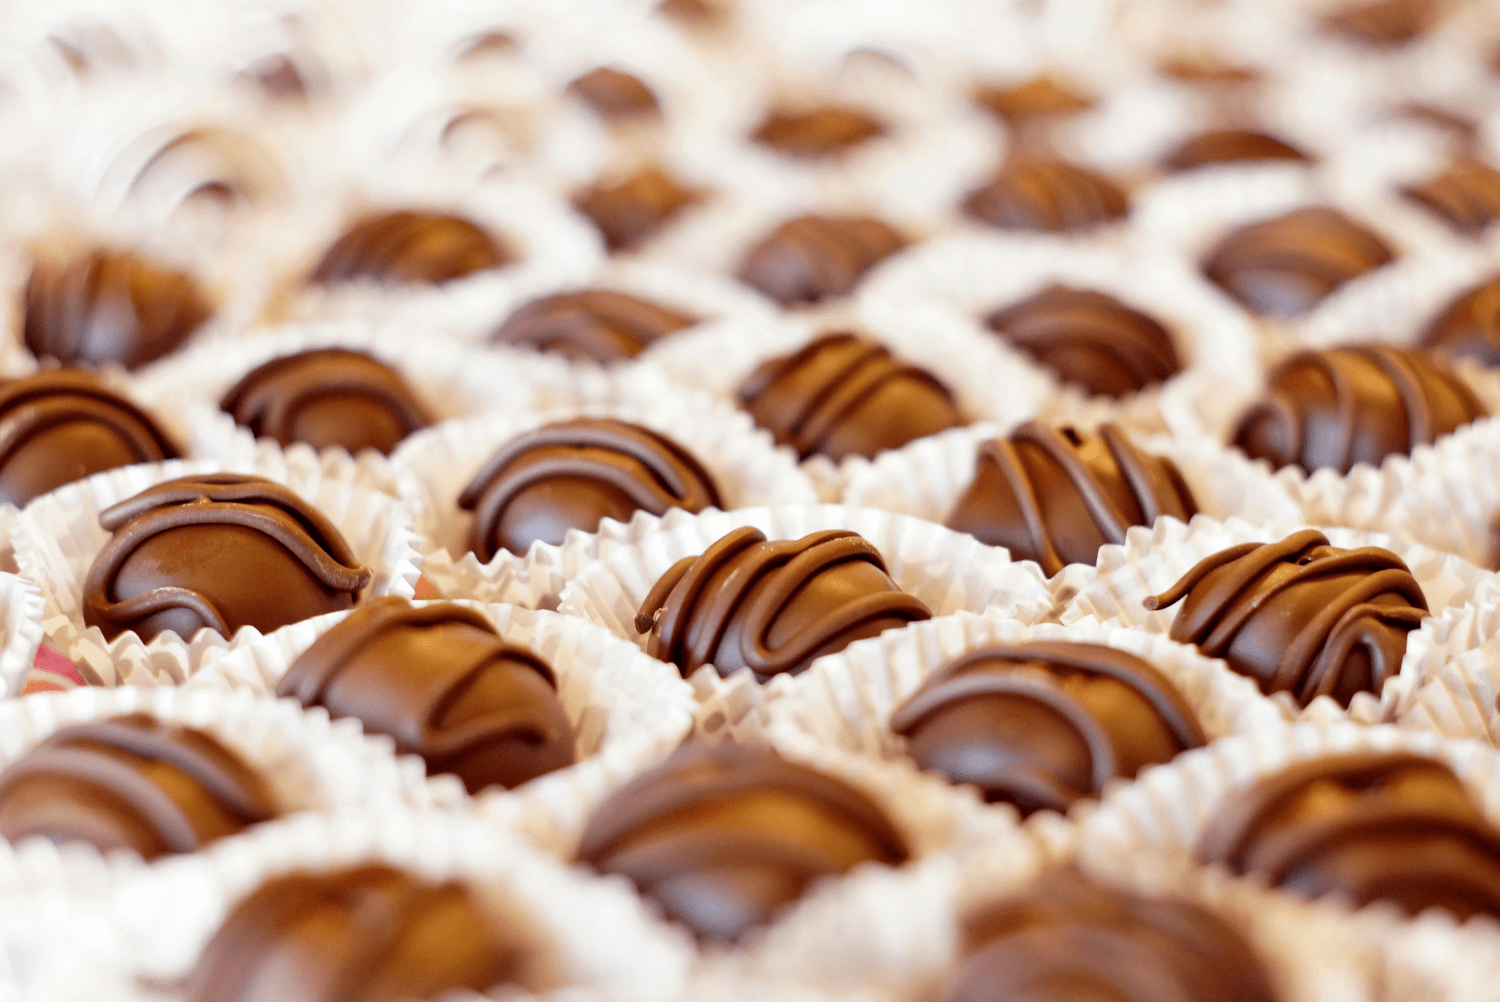
Making Chocolate Truffles
Chocolate truffles offer a luxurious and elegant candy experience. Here’s a simple recipe to whip up some indulgent truffles:
- In a bowl, mix together melted chocolate, heavy cream, and flavourings of your choice.
- Place the mixture in the refrigerator until it firms up.
- Once firm, shape the mixture into small balls and roll them in cocoa powder or other desired coatings such as coconut or nuts.
- Refrigerate the truffles until they are set and ready to be devoured.
Truffles are the perfect canvas for creativity, so feel free to experiment with various flavours, coatings, and decorations.
Crafting Chocolate Bark
Chocolate bark is a simple yet delicious treat that can be customised to your liking. Here’s how to create your own chocolate bark:
- Melt your chocolate and spread it thinly on a parchment-lined baking sheet.
- Sprinkle your favourite toppings, such as crushed nuts, dried fruits, or candy pieces, over the chocolate.
- Refrigerate the bark until it hardens, then break it into bite-sized pieces.
- Indulge in the delightful combination of smooth chocolate and crunchy toppings.
The beauty of chocolate bark lies in its versatility, allowing you to customise and experiment with endless flavour combinations.
Decorating Your Chocolate Candies
Now that you have mastered the art of chocolate candy making, it’s time to add the final touch – decoration! Elevate your candies from delightful to visually stunning with the following techniques.
Using Edible Glitter and Dust
Edible glitter and dust are fantastic ways to add sparkle and shine to your chocolate candies. Simply sprinkle a small amount over your creations for a magical and dazzling effect.
Painting with Coloured Cocoa Butter
Coloured cocoa butter opens up a whole world of artistic possibilities. With a small brush or airbrush, you can paint intricate designs, patterns, or even your own pictures onto your chocolates.
Adding Toppings and Drizzles
Get creative by adding various toppings and drizzles to your candies. From crushed nuts and coloured sprinkles to melted caramel or white chocolate drizzles, the choices are endless.
With these decoration techniques, your chocolates will not only taste divine but also look like they came straight from a professional chocolatier’s kitchen.
There you have it – the ultimate guide to chocolate candy making! Armed with the knowledge of chocolate types, essential tools, melting techniques, and various candy-making methods, you’re ready to embark on a delicious and creative journey. So gather your ingredients, experiment with flavours, and let your imagination guide you as you create delectable treats that will delight friends, family, and most importantly, your own taste buds.
If you’re excited to try your hand at making chocolate candy, don’t stop here! Dive deeper into the sweet world of candy making by visiting Bake Batter and Beyond for more tips, tricks, and delicious recipes. Your chocolate adventure awaits!

About the Author
Kaylene Grieve, a passionate baker and culinary educator, carries on a rich family legacy in the world of pastries and confections that began with her grandfather’s successful bakery. With over two decades of experience in business and marketing, Kaylene combines her baking heritage with digital expertise as the founder of Bake Batter & Beyond. This comprehensive baking resource reflects her mission to make the joy and science of baking accessible to all.
Dedicated to empowering both novice and experienced bakers, Kaylene’s website offers practical knowledge and tools including measurement converters, substitution guides, troubleshooting tips, and baking rescue techniques. Her special focus on the intricate world of cake making, coupled with her unique blend of family tradition and modern savvy, has established Kaylene as a trusted voice in the baking community.

0 Comments