

Have you ever marvelled at those picture-perfect layer cakes with impossibly even layers? Well, I’ve got a secret weapon for you – the cake leveler! This nifty tool
is a game-changer for bakers of all skill levels and is one of the best cake decorating tools we have come across. Did you know that using a cake leveler can reduce cake waste by up to 15%? That’s right, no more lopsided layers or uneven stacks. In this guide, I’ll walk you through everything you need to know about using a leveler to create stunning layer cakes.
Step-by-Step Guide to Using a Cake Leveler
Preparing Your Cake For Leveling
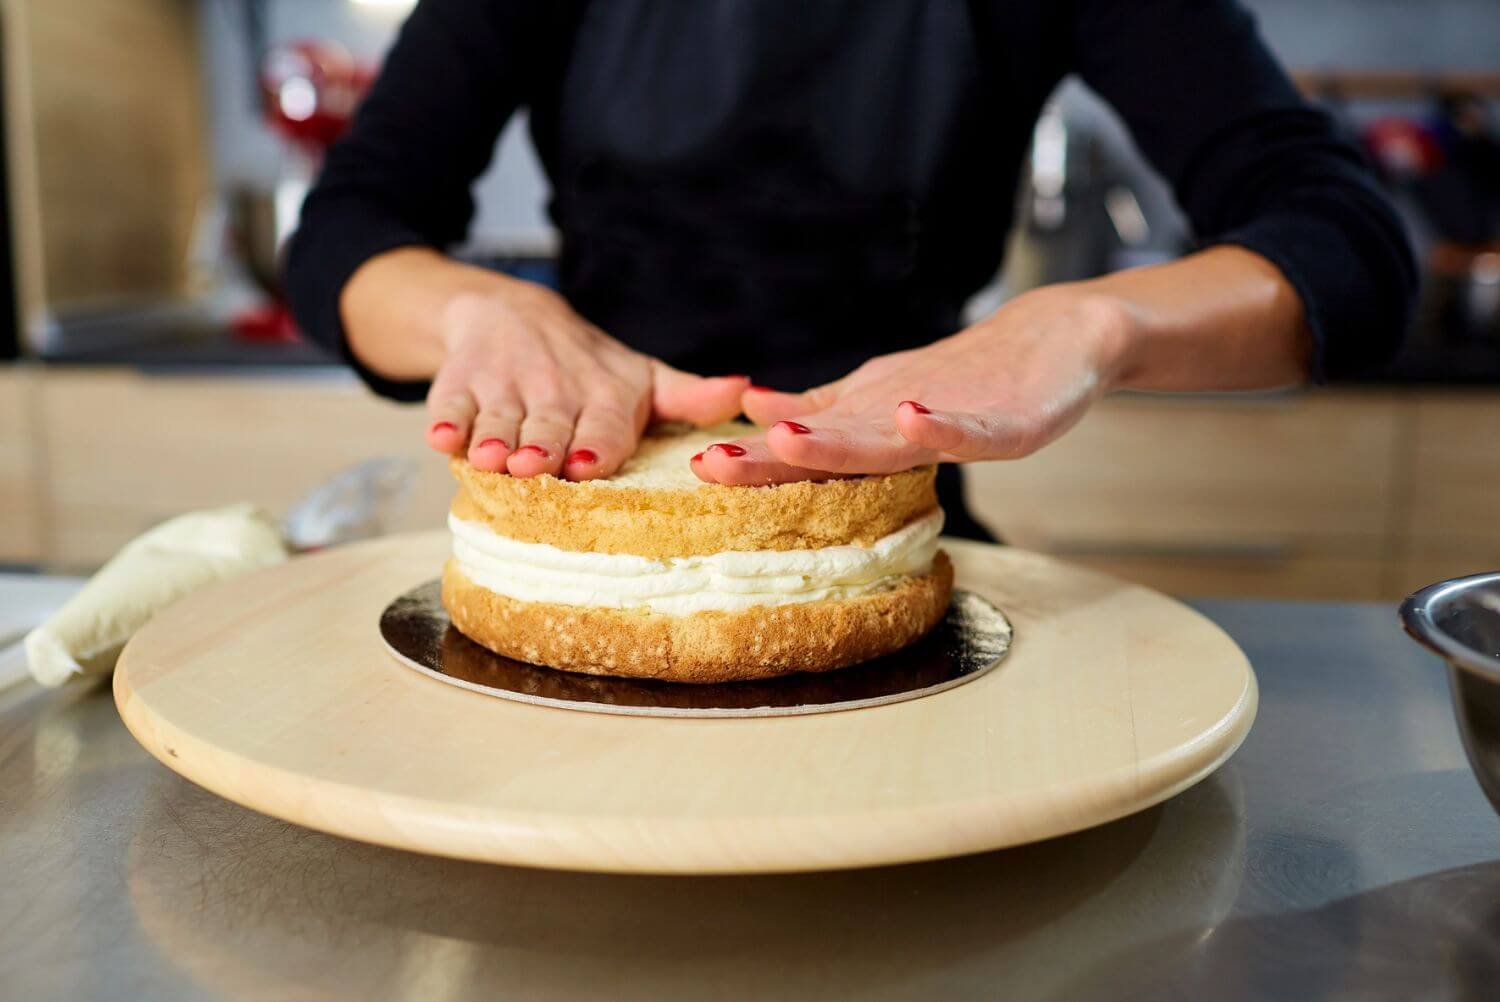
Before you dive in with your cake leveler, it’s crucial to set the stage for success. Start by allowing your cake to cool completely – patience is key here! A warm cake is more likely to crumble or tear when leveled. Once cooled, remove the cake from its pan and place it on a flat, sturdy surface. I like to use a cake turntable for easy maneuvering, but a cutting board works too. If your cake has a domed top, you might want to trim that off first.
Adjusting The Leveler To The Correct Height
Most cake levelers come with adjustable settings, which is a game-changing when it comes to precision. Start by eyeballing the height you want your cake layer to be. Pro tip: if you’re making a multi-tier cake, you might want to divide the total height by the number of layers you’re aiming for. Adjust your cake leveler accordingly, usually by sliding the wire or blade up or down the vertical supports. Don’t be afraid to do a practice run on a scrap piece of cake or even a soft bread loaf to test your height. Remember, it’s always better to start higher and make multiple passes than to cut too low and lose precious cake!
Proper Technique For Cutting Through The Cake
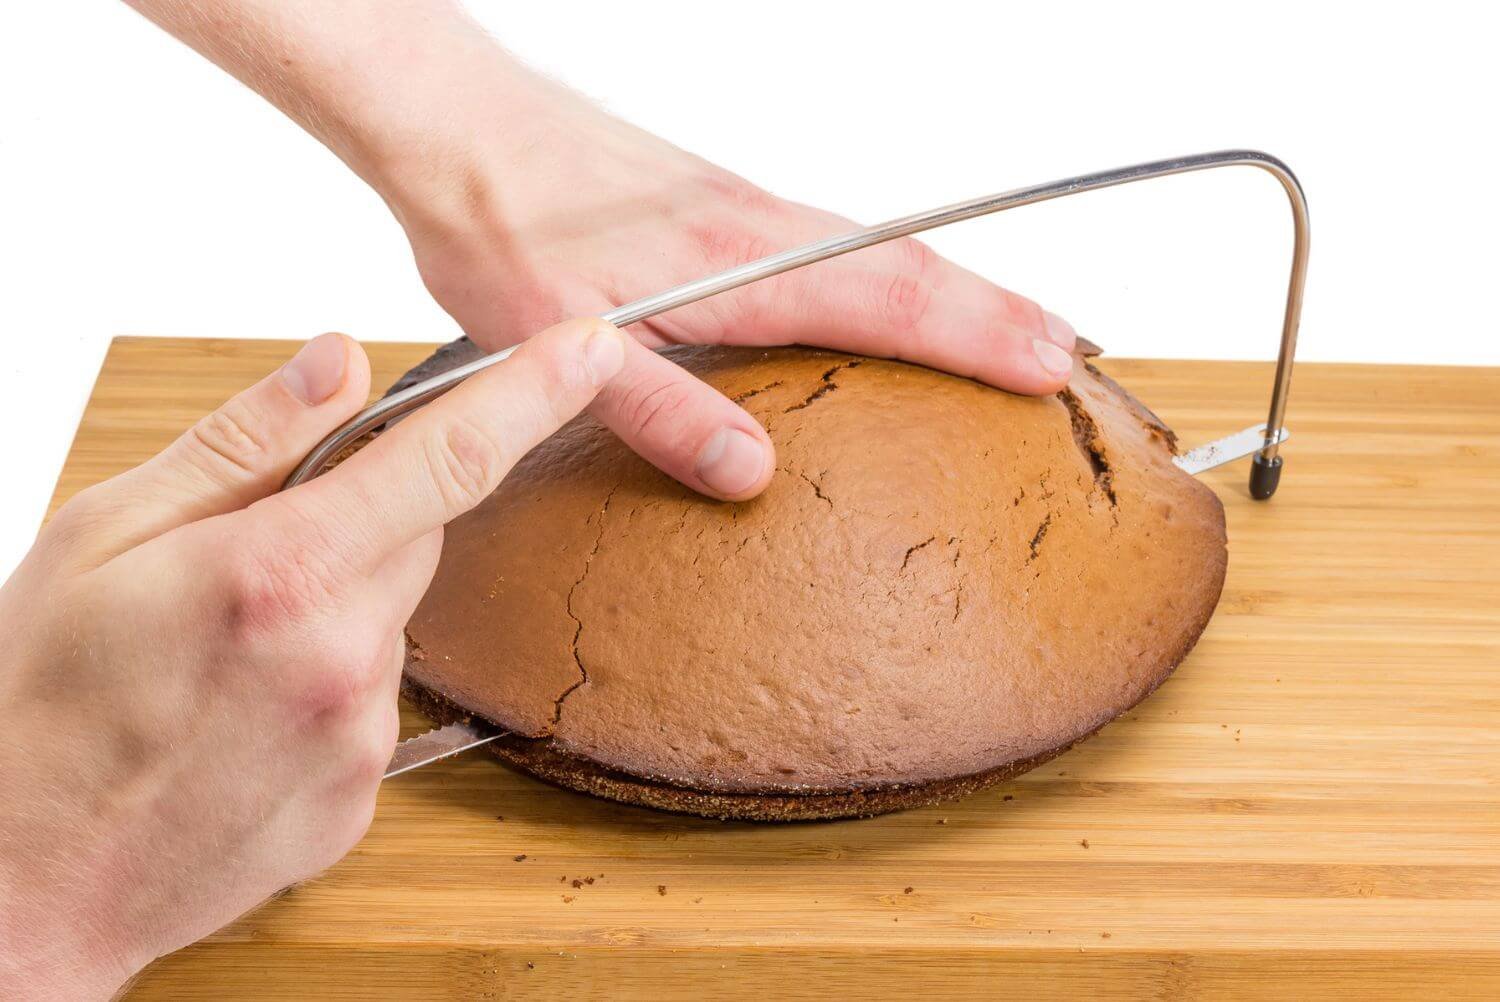
To achieve a perfect cake cut, hold the cake leveler with both hands, keeping it steady and level. Start at one edge and use a slow, gentle sawing motion to draw the wire or blade through the cake, avoiding excessive pressure to prevent uneven cuts or tearing. Maintain a parallel position to the work surface, and if you encounter resistance, clean the wire or blade before continuing. This careful technique will ensure beautifully even layers for your cake.
Tips For Achieving A Clean, Even Cut
To truly master the art of the cake leveler, keep these pro tips in mind.
First, if your cake is particularly delicate or crumbly, pop it in the freezer for about 15 minutes before leveling. This firms up the crumb and makes for cleaner cuts.
Next, consider the direction of your cut. Some bakers swear by rotating the cake as they level, while others prefer to move the leveler in one continuous motion. Experiment to see what works best for you!
Don’t forget to clean your cake leveler between cuts, especially if you’re creating multiple layers. A clean tool is essential for cake cutting precision.
Finally, once you’ve made your cut, use a long, thin spatula or cake lifter to carefully remove the top layer. This prevents any accidental tearing or crumbling. With these tips and your trusty cake leveler, you’ll be creating bakery-worthy layer cakes in no time!
What is a Cake Leveler and Why Use One?
Definition And Purpose Of A Cake Leveler
A leveler is an essential baking tool designed to create perfectly even layers in cakes. This ingenious device consists of a wire or blade attached to an adjustable frame, allowing bakers to slice through cakes horizontally with precision. The primary purpose of a leveler is to achieve uniform cake layer thickness, which is crucial for creating professional-looking layer cakes. By using a leveler, you can easily remove domed tops and create multiple even layers from a single cake, ensuring that your final creation has a polished, symmetrical appearance.
Benefits Of Using A Cake Leveler Vs. Other Methods
When it comes to cake leveling for beginners, a leveler offers several advantages over traditional methods like using a serrated knife or dental floss. Firstly, a leveler provides unparalleled accuracy, allowing you to achieve consistent results every time. Unlike manual cutting, which can lead to uneven layers or accidental slanting, a leveler ensures a perfectly straight cut across the entire cake. This precision is especially valuable when working on multi-tier cake structures or intricate designs where even the slightest imperfection can be noticeable. Additionally, using a leveler significantly reduces cake waste, as it minimises crumbling and allows for more controlled cuts.
Types Of Cake Levelers Available In The Market
The market offers a variety of levelers to suit different needs and preferences. Adjustable wire levelers are popular among home bakers due to their versatility and affordability. These tools feature a thin wire that can be adjusted to different heights, allowing you to create layers of various thicknesses. For those seeking more stability, there are levelers with sturdy blades instead of wires. These are often preferred by professional bakers and are great for denser cakes. Some advanced models even come with multiple wires or blades for simultaneous cuts, perfect for creating uniform layers in tall cakes quickly.
When To Use A Cake Leveler In Your Baking Process
Incorporating a leveler into your baking process can elevate the quality of your cakes significantly. It’s particularly useful when preparing layer cakes, where even layers are crucial for both aesthetics and structural integrity. Use a leveler after your cake has completely cooled to remove any domed tops, creating a flat surface ideal for stacking and frosting. For tall cakes, you can use the leveler to divide a single cake into multiple even layers, allowing for more filling and a more impressive final product. Even when making a simple single-layer cake, using a leveler to create a flat top ensures a professional finish, especially when applying fondant or creating intricate decorations.

Choosing the Right Cake Leveler for Your Needs
Factors To Consider When Selecting A Cake Leveler
When choosing the perfect cake leveler for your baking toolkit, several key factors come into play. First, consider the size and types of cakes you typically create. Are you a fan of towering multi-tier cakes, or do you stick to single-layer desserts?
The versatility of your cake leveler is crucial. Think about the maximum height it can accommodate and whether it can handle various cake textures and densities. Ease of use is another vital aspect – look for a cake leveler with a comfortable grip and smooth cutting action. Don’t forget about storage space in your kitchen; some levelers are more compact than others.
Lastly, consider your skill level and how often you’ll use the tool. A professional baker might invest in a high-end cake leveler with advanced features, while a hobbyist could opt for a simpler model. Remember, the right cake leveler can significantly improve your cake layer uniformity and overall baking precision!
Adjustable Vs. Fixed-Height Cake Levelers
When it comes to cake levelers, you’ll typically encounter two main types: adjustable and fixed-height models.
Adjustable cake levelers are the Swiss Army knives of cake cutting tools. They allow you to set the wire or blade at various heights, making them incredibly versatile for different cake sizes and layer thicknesses. This flexibility is perfect for bakers who love experimenting with multi-tier cakes or want precise control over their layer cake preparation.
On the flip side, fixed-height cake levelers have a set cutting position. While they might seem limited, they excel in consistency – ideal for bakers who frequently make cakes of the same height. They’re often more straightforward to use, making them great for beginners or those who prioritise speed in their baking process. Whichever type you choose, both adjustable and fixed-height cake levelers can significantly improve your cake cutting precision and help achieve those picture-perfect even cake layers we all strive for!
Materials And Durability Considerations
When investing in a cake leveler, the materials used in its construction play a crucial role in its durability and performance. Most high-quality cake levelers feature stainless steel blades or wires, prized for their sharpness, resistance to rust, and longevity. The frame of the leveler is equally important – look for sturdy materials like reinforced plastic or metal that can withstand the pressure of cutting through dense cakes without bending or breaking. Some premium models even offer replaceable blades, extending the tool’s lifespan.
Consider the grip as well; ergonomic handles made from non-slip materials can make a world of difference during those marathon baking sessions. Remember, a durable cake leveler is an investment in your baking accuracy and cake decorating fundamentals. It should withstand frequent use, easy cleaning (dishwasher-safe is a bonus!), and proper storage without losing its edge.
Budget-Friendly Options For Beginners
Starting your journey into the world of cake leveling doesn’t have to break the bank! There are plenty of budget-friendly cake levelers that offer great value for beginners. Many affordable models still provide the essential features you need for achieving even cake layers and improving your cake cutting consistency. Look for basic wire cake levelers or simple blade designs that get the job done without fancy bells and whistles. Some budget options even come in sets, offering multiple cutting heights at a reasonable price.
Remember, it’s not always about having the most expensive tools; it’s about mastering the techniques. With a bit of patience and practice, even a basic cake leveler can help you create beautifully layered cakes that look like they came straight from a professional bakery.
Maintaining and Cleaning Your Cake Leveler
Proper Cleaning Techniques After Each Use
Maintaining your cake leveler’s cleanliness is crucial for both hygiene and longevity. After each use, gently wash your cake leveler with warm, soapy water, being careful not to bend the wire or damage the frame. Pay special attention to removing any cake crumbs or frosting residue that may have accumulated on the wire or adjustable parts. For stubborn bits, use a soft brush to avoid scratching the surface. Once clean, thoroughly dry your cake leveler with a lint-free cloth to prevent water spots and potential rust formation. This simple cleaning routine will ensure your cake leveler remains in top condition for your next baking project.
Storage Tips To Prevent Damage And Rust
Proper storage is key to preserving your cake leveler’s functionality and appearance. After cleaning and drying, store your cake leveler in a cool, dry place away from moisture and direct sunlight. Consider using a protective case or wrapping it in a soft cloth to prevent scratches and dust accumulation. If your cake leveler has adjustable parts, store it in its most compact position to minimise stress on the components. For added protection against rust, you can lightly oil the metal parts with food-grade mineral oil before storage. By following these storage tips, you’ll extend the life of your cake leveler and ensure it’s always ready for your next cake-leveling task.
When To Replace The Blade Or Entire Leveler
Knowing when to replace parts of your cake leveler or the entire tool is essential for maintaining quality results. Inspect the wire or blade regularly for signs of wear, such as fraying, kinks, or rust spots. If you notice any of these issues, it’s time to replace the wire or blade to ensure clean, even cuts. For cake levelers with fixed blades, consider replacement if the edge becomes dull or nicked. If the frame shows signs of warping, cracking, or excessive wear, or if the adjustable mechanisms no longer function smoothly, it may be time to invest in a new cake leveler. Remember, a well-maintained cake leveler can last for years, but timely replacements ensure consistently professional results.
Alternative Uses for Your Cake Leveler
Leveling Brownies And Bar Desserts
A cake leveler isn’t just for cakes! This versatile tool can elevate your brownie and bar dessert game to new heights. When baking brownies or blondies, they often dome in the centre, creating an uneven surface. The cake leveler not only improves the appearance of your treats but also ensures even frosting distribution. For layered bar desserts, use the cake leveler to split a single thick layer into two thinner ones, allowing you to add exciting fillings between layers for a more complex and delicious treat.
Creating Even Layers In Trifles And Parfaits
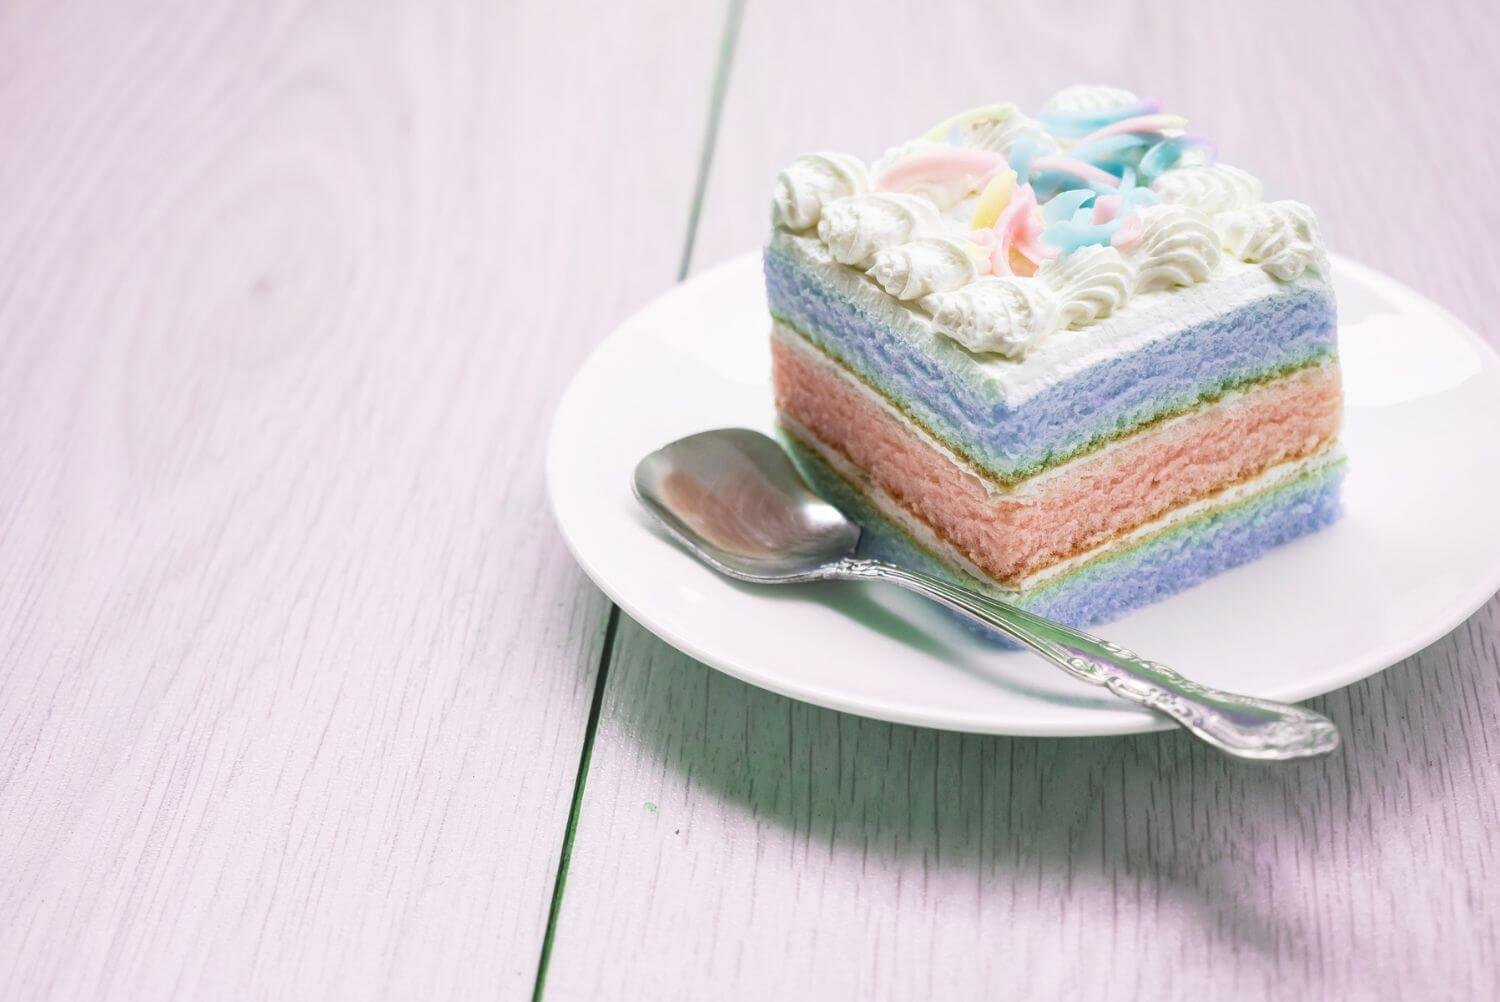
Trifles and parfaits are all about beautiful, distinct layers, and a cake leveler can be your secret weapon in achieving dessert perfection. Use this tool to create uniform slices of cake, brownies, or even firm custards for your layered desserts. The cake leveler’s precise cutting ability ensures that each layer in your trifle or parfait is exactly the same thickness, resulting in a visually stunning and professionally crafted dessert. This consistency not only enhances the aesthetics but also guarantees that each spoonful of your layered creation contains the perfect balance of flavours and textures.
Using A Cake Leveler For Bread And Pastry Work
Don’t limit your cake leveler to just sweet treats – it’s an invaluable tool for bread and pastry work too! When making homemade sandwich bread, use the leveler to create perfectly even slices that rival those from a bakery. For pastry work, the cake leveler can help you split puff pastry or croissant dough into precise layers for laminating, ensuring even butter distribution and ultimately, flakier results. You can also use it to level the tops of freshly baked artisan loaves, creating a flat surface ideal for decorative scoring or toppings.
Innovative Ways To Incorporate A Leveler In Non-Baking Projects
Think outside the cake pan and discover innovative uses for your cake leveler beyond the kitchen! Crafters can use this tool to cut uniform slices of soap loaves for handmade bath products. In the garden, a cake leveler can help create clean edges when harvesting microgreens or trimming herb gardens. For DIY projects, use it to score and cut lightweight craft foam or thin sheets of balsa wood for model making. The cake leveler’s adjustable wire and sturdy frame make it a surprisingly versatile tool for various precision cutting tasks, proving its worth far beyond its intended baking purpose.
With these tips and tricks for using a cake leveler, you’re well on your way to mastering professional baking techniques and creating layer cakes that look perfectly polished and expertly crafted.
For more articles on cake decorating, visit our blog.


About the Author
Kaylene Grieve, a passionate baker and culinary educator, carries on a rich family legacy in the world of pastries and confections that began with her grandfather’s successful bakery. With over two decades of experience in business and marketing, Kaylene combines her baking heritage with digital expertise as the founder of Bake Batter & Beyond. This comprehensive baking resource reflects her mission to make the joy and science of baking accessible to all.
Dedicated to empowering both novice and experienced bakers, Kaylene’s website offers practical knowledge and tools including measurement converters, substitution guides, troubleshooting tips, and baking rescue techniques. Her special focus on the intricate world of cake making, coupled with her unique blend of family tradition and modern savvy, has established Kaylene as a trusted voice in the baking community.

0 Comments