

Are you frustrated with pesky air bubbles ruining the smooth finish of your buttercream frosting? If you’ve ever spent hours carefully decorating a cake only to have air bubbles mar its pristine appearance, you’re not alone. As a professional baker with years of experience, I understand how challenging it can be to achieve that flawless, silky-smooth finish that truly elevates your cake designs and makes them look incredibly professional. Not only do air bubbles detract from the aesthetic appeal of your cakes, but they can also affect the overall texture and mouthfeel of the frosting.
In this comprehensive guide, I’ll share proven tips and techniques that teach you how to prevent air bubbles in buttercream icing effectively. From the initial mixing process to the final application, I’ll cover everything you need to know to achieve that perfect, bubble-free finish every time. With the right methods and a little practice, you’ll be able to create stunning cakes that not only look amazing but also taste delightful. Let’s dive in and transform your buttercream skills!
Why Do Air Bubbles Form in Buttercream?
Before diving into how to prevent air bubbles in buttercream icing, it’s crucial to understand why they develop in the first place. Knowing these causes can help you avoid common mistakes and achieve a smooth, flawless finish on your cakes. Here are a few primary reasons:
- Incorporating Too Much Air During Mixing
Overmixing or mixing at high speeds can introduce excess air into the buttercream, resulting in unwanted bubbles. Buttercream benefits from a gentle mixing approach, especially toward the end of the mixing process, to help minimize air pockets. - Incorrect Ingredient Temperatures
Butter that’s too warm or too cold can affect the texture and stability of your buttercream, making it prone to air bubbles. Using butter at a stable room temperature, around 20-22°C (68-72°F), ensures a smoother consistency and helps reduce the likelihood of air bubbles. - Improper Mixing Techniques
Different buttercream recipes call for specific mixing methods. Techniques like pulsing at the end of mixing or gently folding in additional ingredients by hand help in how to prevent air bubbles in buttercream icing effectively. - Using the Wrong Tools or Speeds
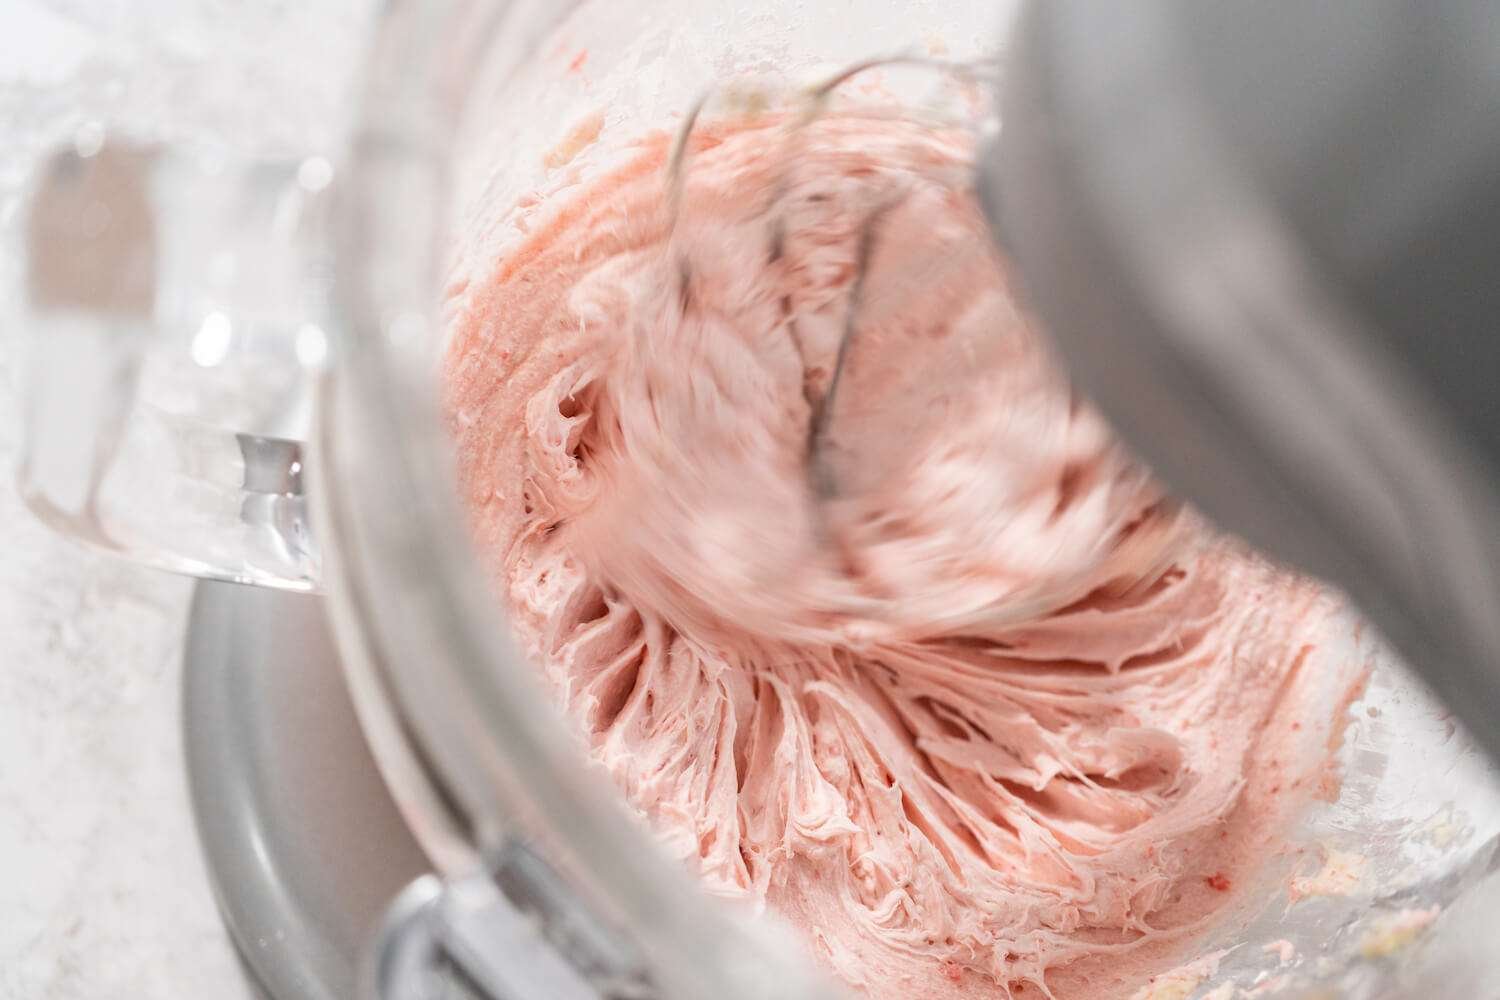
Using a whisk attachment instead of a paddle, or setting your mixer to a high speed, will whip too much air into the icing. A paddle attachment on low to medium speed is ideal for smooth, bubble-free buttercream.
Essential Tools for Bubble-Free Buttercream
The right tools make all the difference when mastering how to prevent air bubbles in buttercream icing. To create a smooth, creamy texture, be sure to have these items on hand:
- Stand Mixer with Paddle Attachment
A stand mixer equipped with a paddle attachment is one of the best tools for mixing buttercream effectively. This mixer is specifically designed to blend ingredients thoroughly without introducing excess air, which can lead to unwanted bubbles in your icing. To maintain a smooth and consistent mixture, a stand mixer with a paddle attachment is invaluable when learning how to prevent air bubbles in buttercream icing. Its efficiency not only saves time but also ensures that your buttercream maintains that luxurious, velvety texture. - Rubber Spatula
A sturdy rubber spatula is an essential tool in any baker’s kitchen, particularly when working with buttercream. This versatile implement helps you scrape down the sides and bottom of the mixing bowl, ensuring that all ingredients are thoroughly combined. By doing so, you significantly reduce the chance of air pockets forming in the final mixture. When you’re focused on how to prevent air bubbles in buttercream icing, using a rubber spatula to mix and fold the ingredients can make a noticeable difference in the texture and consistency of your frosting. - Stainless Steel Bench Scraper
A stainless steel bench scraper is not only useful for transferring ingredients but also plays a crucial role in the final presentation of your cake. When you’re applying buttercream to the surface of your cake, using a bench scraper helps smooth out the icing, ensuring a professional finish. Its firm, flat edge is particularly effective at removing any remaining bubbles, which contributes to a flawless look. If you want to master how to prevent air bubbles in buttercream icing, incorporating a bench scraper into your decorating toolkit is a smart choice. - Digital Thermometer
Monitoring the temperatures of your butter and other liquid ingredients with a digital thermometer is an essential step in achieving the perfect buttercream. This tool allows you to ensure that your ingredients are at the optimal temperature for mixing, which is critical for a stable and smooth buttercream. By keeping a consistent temperature, you help maintain a creamy texture that minimizes bubbles. When you understand how to prevent air bubbles in buttercream icing, you’ll find that precise temperature control significantly contributes to the success of your frosting. - Sieve or Fine-Mesh Strainer
When preparing your buttercream, taking the time to sift your powdered sugar before adding it to the butter can greatly enhance the final product. Using a sieve or fine-mesh strainer helps to eliminate clumps in the sugar, which is crucial for achieving a smooth, bubble-free consistency. This simple step not only improves the texture of your icing but also aligns with your goal of learning how to prevent air bubbles in buttercream icing. By ensuring that your powdered sugar is well-sifted, you set the stage for a beautifully creamy and flawless buttercream that will impress your friends and family.
Tips to Prevent Air Bubbles in Buttercream Icing
Air bubbles in buttercream can be incredibly frustrating, especially when you’re striving for a smooth, professional finish on your cakes. The presence of these bubbles can detract from the overall appearance and texture of your frosting, making it less appealing. Fortunately, there are several techniques that can help reduce or even eliminate these pesky bubbles. Below are some effective tips on how to prevent air bubbles in buttercream icing for a perfectly smooth texture every time.
Mix at the Right Speed
To prevent air bubbles in buttercream icing, control your mixing speed by starting at low to medium speed to gradually blend ingredients, then reduce to the lowest setting to finish. This method avoids incorporating excess air, maintaining a dense, creamy texture for a smooth finish.
Proper Tool Selection
Using the right mixer attachment is crucial for preventing air bubbles in buttercream icing. A paddle attachment gently combines ingredients without incorporating too much air, resulting in a smooth consistency. If only a whisk is available, use it on the lowest speed and finish mixing by hand with a spatula to release excess air. Proper tool selection is key to achieving professional-quality buttercream.
Hand Finishing
Once you’ve completed the initial mixing, don’t skip the important step of hand finishing. Use a rubber spatula to press the buttercream against the sides of the mixing bowl. This pressing motion effectively releases any trapped air bubbles and improves the texture of the buttercream, making it smoother and easier to spread on your cake. Hand-finishing also allows you to monitor the consistency closely, making adjustments as needed to achieve that perfect, bubble-free texture. This extra step may seem minor, but it’s incredibly helpful for preventing air bubbles in buttercream icing, as it gives you more control over the final product.
Let it Rest
Allowing the buttercream to rest is a surprisingly effective method in how to prevent air bubbles in buttercream icing. By letting the buttercream sit, covered, for around 10 to 15 minutes, any remaining air bubbles have a chance to rise naturally to the top. After the resting period, you can use a spatula to gently press out these bubbles, ensuring a smoother final texture. Just be cautious not to let the buttercream sit uncovered for too long, as it may start to crust over. Resting is often overlooked but is a valuable technique in how to prevent air bubbles in buttercream icing, and it makes a noticeable difference in the finished product.
The Right Consistency
Adjusting the consistency of your buttercream is another important part of how to prevent air bubbles in buttercream icing. A stiffer buttercream is more likely to trap air, so if you find your buttercream is too firm, consider adding a small amount of liquid, such as milk or cream. This addition helps soften the buttercream, making it more pliable and less prone to air pockets. Aim for a texture that is smooth and spreadable without being overly soft, as this balance minimizes the chance of creating air bubbles. Getting the right consistency can take a bit of practice, but it’s essential in how to prevent air bubbles in buttercream icing.
Temperature Matters
Working with ingredients at room temperature is crucial when learning how to prevent air bubbles in buttercream icing. Cold butter, for instance, can create a stiffer texture that traps air, while butter that’s too warm can make the buttercream too soft and difficult to work with. Bringing your butter and other ingredients to a stable room temperature—around 20-22°C (68-72°F)—promotes a smooth, creamy consistency. This temperature control is vital for the final quality of the buttercream and is a key aspect of how to prevent air bubbles in buttercream icing.
Scraping Techniques
Frequent scraping of the bowl during mixing is a simple yet effective way to master how to prevent air bubbles in buttercream icing. Use a spatula to scrape down the sides and bottom of your mixing bowl regularly, ensuring all ingredients are fully incorporated and preventing pockets of unmixed ingredients. This technique keeps the buttercream uniform and reduces the need for additional mixing, which could introduce more air. Scraping might seem like a small detail, but it’s a powerful method in how to prevent air bubbles in buttercream icing, and it contributes to a perfectly smooth finish.
Application Technique
When it’s time to apply the buttercream to your cake, the way you spread it makes a significant difference in how to prevent air bubbles in buttercream icing. Use smooth, gentle strokes to apply the icing, avoiding aggressive spreading, which can create air pockets. A gentle hand ensures a flawless finish, and if you do notice any bubbles forming on the surface, you can use a heated metal spatula to smooth them out. Heat the spatula by dipping it in hot water and drying it off before gently gliding it over the surface. Proper application technique is key in how to prevent air bubbles in buttercream icing, and it makes all the difference in creating a beautiful, bubble-free cake.
By incorporating these tips and techniques into your baking routine, you’ll be well-equipped to tackle the issue of air bubbles and achieve the smooth, professional finish you desire. Each method plays an important role in ensuring that your buttercream icing not only looks great but also tastes delicious, enhancing the overall experience of your baked goods.
Common Mistakes to Avoid
Avoiding common mistakes in buttercream preparation is key to knowing how to prevent air bubbles in buttercream icing. Simple changes in your approach can significantly improve the texture of your buttercream.
- Overmixing at High Speed
Overmixing, especially at high speeds, is one of the main causes of air bubbles in buttercream. High speed introduces excess air into the mix, creating unwanted air pockets that disrupt the smooth texture. Instead, focus on mixing at a low to medium speed for the entire process. Start with a slower speed to combine the ingredients, then keep it low until the buttercream is fully smooth. This adjustment in technique is essential in how to prevent air bubbles in buttercream icing while ensuring a creamy, even finish. - Wrong Temperature
Temperature control is critical for buttercream consistency. If your butter is too cold, it can create lumps, making it challenging to achieve a smooth result without vigorous mixing (which adds air). On the other hand, if the butter is too warm, the buttercream may become unstable and hard to work with. Keep butter at an optimal room temperature of 20-22°C (68-72°F), which is key in how to prevent air bubbles in buttercream icing by promoting a smooth, easily spreadable texture. - Rushing the Process
Patience is vital in achieving flawless buttercream. When you rush, skipping steps like properly softening the butter or gradually adding powdered sugar, the buttercream often ends up with air pockets. Softening the butter properly ensures it mixes smoothly with minimal air incorporation. Additionally, adding sugar in stages prevents clumps and air from getting trapped in the mixture. Taking these small steps is crucial in how to prevent air bubbles in buttercream icing and allows for a smoother, bubble-free final product. - Using the Wrong Tools
The tools you use impact the texture of your buttercream. Avoid whisk attachments, which whip more air into the icing, increasing the chance of bubbles. For a smooth buttercream, stick to a paddle attachment on a stand mixer, which incorporates ingredients without excess air. Hand mixers can also be challenging as they typically have higher speed settings, making it harder to control air incorporation. Choosing the right tools is an important part of how to prevent air bubbles in buttercream icing and ensures a better texture in your finished product.
Troubleshooting Guide
Here’s a guide to tackling common air bubble issues in buttercream, helping you master how to prevent air bubbles in buttercream icing at every stage of the process.
- Problem: Large Air Pockets
Solution: Large air pockets in buttercream can be smoothed out by pressing the buttercream against the sides of the mixing bowl with a rubber spatula, which helps push out some of the trapped air. Afterwards, mix the buttercream at the lowest possible speed for a minute or two. This gentle mixing removes any remaining large pockets and is a helpful method in how to prevent air bubbles in buttercream icing while keeping it smooth. - Problem: Tiny Surface Bubbles
Solution: Small surface bubbles can be eliminated by letting the buttercream rest for 15-20 minutes. This resting period allows some of the air to rise to the surface naturally. After resting, smooth the buttercream with a heated bench scraper by running it under hot water, drying it off, and then gliding it over the surface. This technique is effective for preventing air bubbles in buttercream icing, leaving a velvety, bubble-free finish. - Problem: Persistent Bubbles
Solution: For stubborn, persistent bubbles that refuse to smooth out, try straining the buttercream through a fine-mesh sieve. This removes any large clumps and breaks down the bubbles. After straining, briefly remix the buttercream on the lowest speed for a smooth texture. Straining is one of the most effective solutions in how to prevent air bubbles in buttercream icing, helping to eliminate any lingering air pockets.
Final Thoughts:
Following these methods can make a significant difference in achieving a smooth buttercream finish, free from air bubbles. By controlling mixing speeds, using proper tools, and paying close attention to technique, you’ll master how to prevent air bubbles in buttercream icing and create cakes with a flawless, professional look.
Visit Bake Batter and Beyond to uncover more about achieving the perfect buttercream, mastering new techniques, and creating beautiful cakes with ease. Get inspired today and elevate your cake-decorating game!


About the Author
Kaylene Grieve, a passionate baker and culinary educator, carries on a rich family legacy in the world of pastries and confections that began with her grandfather’s successful bakery. With over two decades of experience in business and marketing, Kaylene combines her baking heritage with digital expertise as the founder of Bake Batter & Beyond. This comprehensive baking resource reflects her mission to make the joy and science of baking accessible to all.
Dedicated to empowering both novice and experienced bakers, Kaylene’s website offers practical knowledge and tools including measurement converters, substitution guides, troubleshooting tips, and baking rescue techniques. Her special focus on the intricate world of cake making, coupled with her unique blend of family tradition and modern savvy, has established Kaylene as a trusted voice in the baking community.
Looks amazing. Can’t wait to try this recipe.
Looks yummy