

Holy frosting, fellow cake enthusiasts! Did you know that 78% of professional bakers consider piping tips their secret weapon for creating jaw-dropping cakes? It’s true! Whether you’re a novice decorator or a seasoned pro, having the right piping tips in your arsenal can make all the difference between a “meh” cake and a masterpiece. Today, we’re diving into the sweet world of cake decorating to explore the 10 absolute best piping tips that’ll transform your creations from ordinary to extraordinary. Get ready to pipe like a pro!
The 10 Best Piping Tips Every Cake Decorator Needs
After years of decorating cakes (and making plenty of messy mistakes along the way), I’ve narrowed down my top 10 must-have piping tips.
Round Tip #10: This little guy is like the Swiss Army knife of piping tips. I use it for everything from writing “Happy Birthday” to creating those adorable polka dot designs.
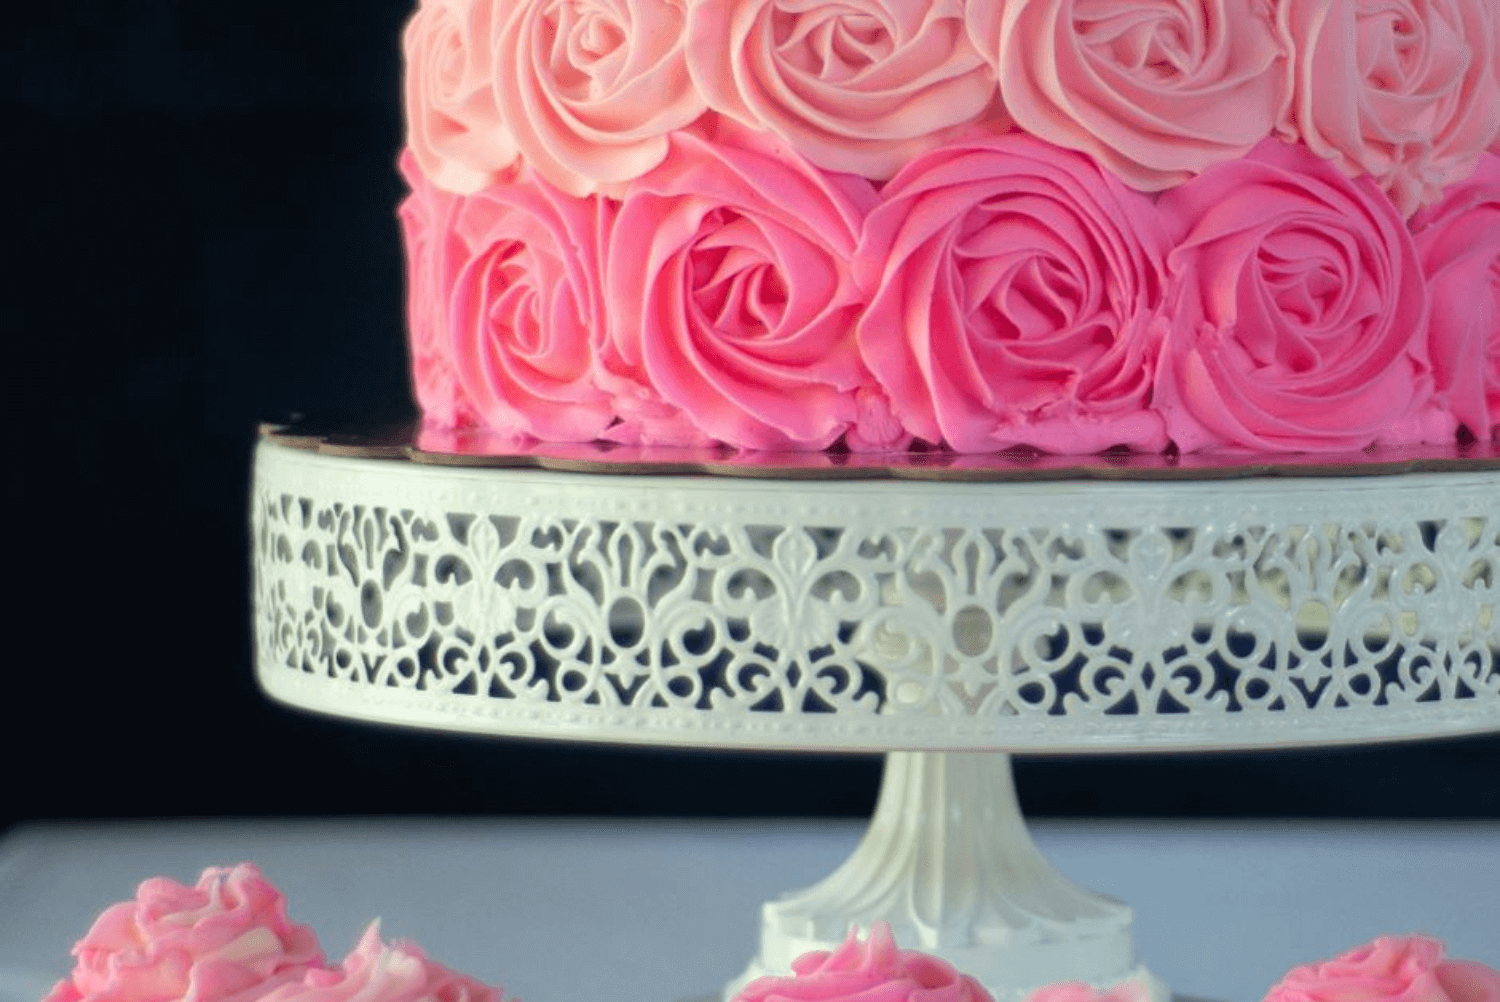
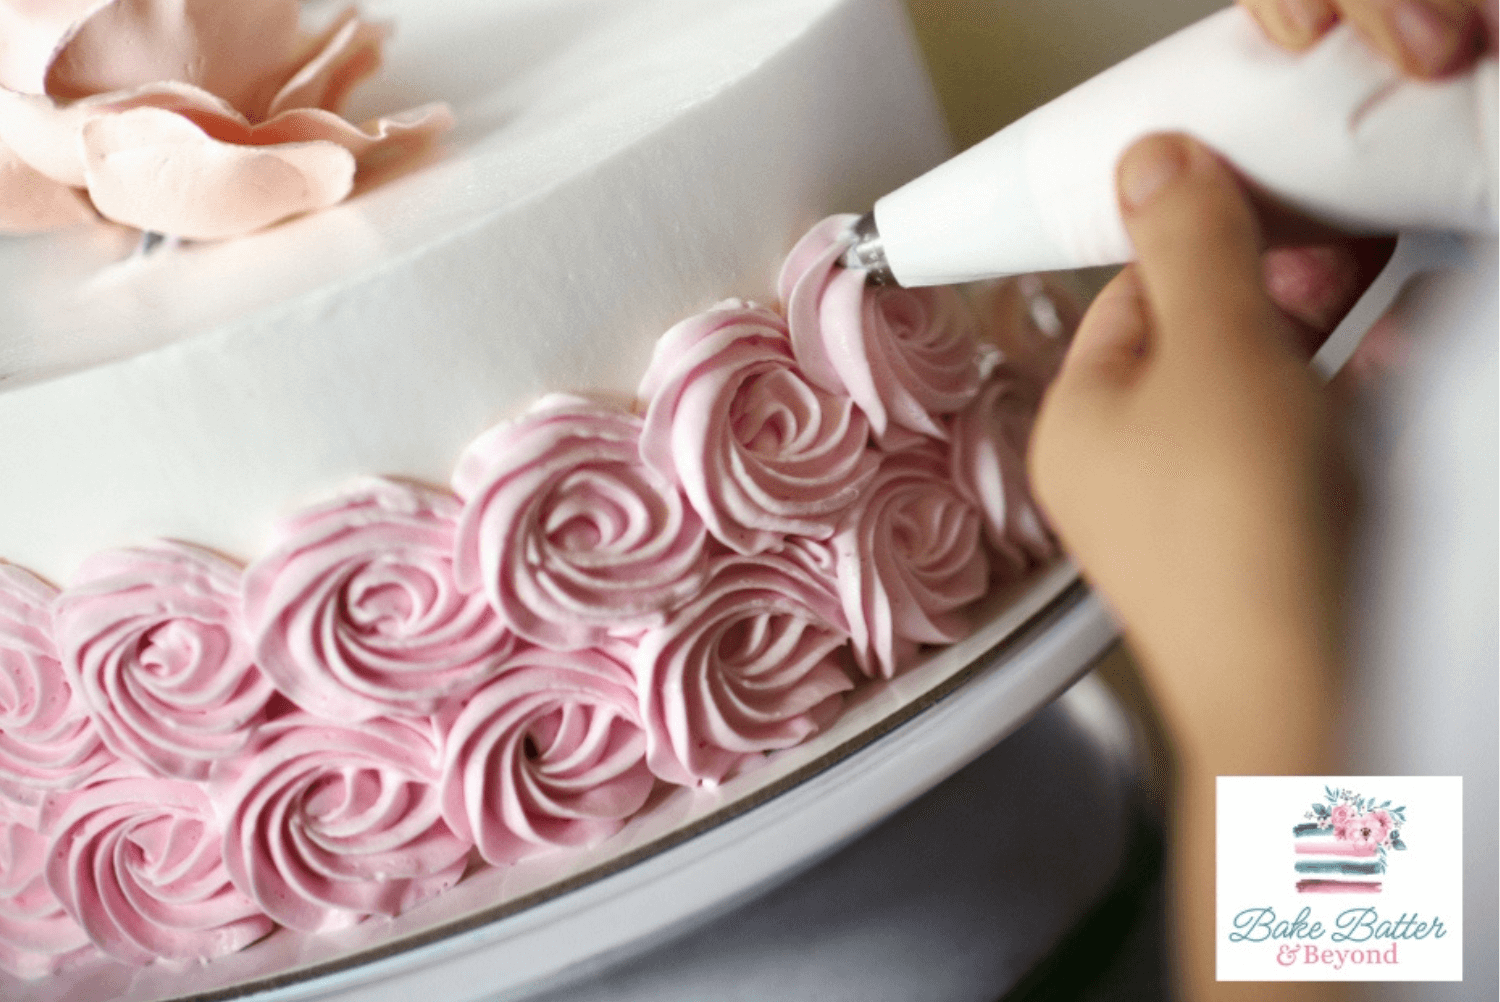
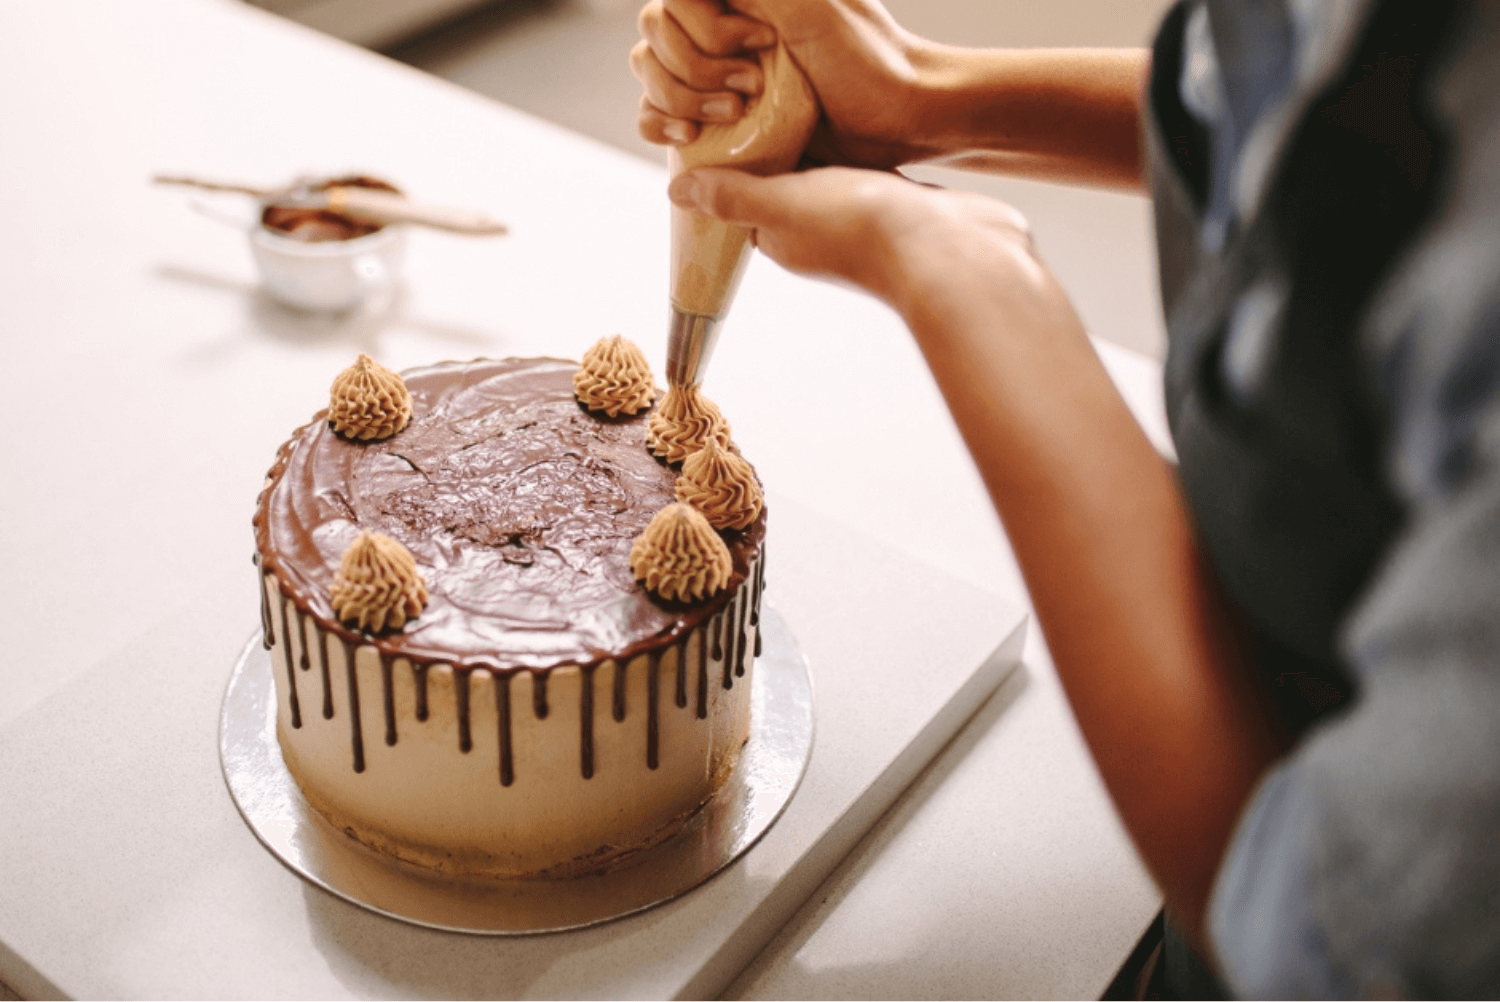
Star Tip #1M: It’s perfect for those classic swirly rosettes that make everyone go “oooh” and “aaah”. Also good for borders and textured backgrounds.
Petal Tip #104: This is the secret weapon for creating those gorgeous buttercream flowers. Roses, carnations, you name it! Also great for making ruffled edges and garlands.
Leaf Tip #352: is another game-changer. It’s not just for leaves, though! I’ve used it to create everything from grass to fur textures. Once, I even used it to make a “hairy” monster cake.
Basketweave Tip #47: This one’s a bit tricky to master. I remember struggling with this tip for ages, my cakes looking less “woven” and “wobblier”. But persistence pays off.
French Tip #6B: is like the fancy cousin of the star tip. It creates elegant shells and borders that’ll make your cakes look totally pro. Fair warning though: the first time I used this tip, my shells looked more like slugs. Not exactly the elegant look I was going for!
Ruffle Tip #103: This one is perfect for creating those delicate, fabric-like textures. I once made a wedding cake with ruffled tiers that looked so real, the bride thought it was actual fabric!
Multi–Opening Tip #233: is a real time-saver. Want to pipe grass or fur? I’ve used it to make a “grass” cake for a golf enthusiast, under flowers on cupcakes and animal fur for some puppy cupcakes. It looked so real.
Closed Star Tip #2D: is my go-to for adding texture to buttercream or making drop flowers. It creates these gorgeous, intricate patterns that’ll have everyone thinking you spent hours on them. Little do they know, right?
Bismarck Tip #230: This isn’t just for filling cupcakes (although it’s awesome for that). You can use it to create some pretty cool 3D decorations too. I once used it to make little meringue ghosts for a Halloween cake. They were a hit.
Understanding the Basics of the Best Piping Tips
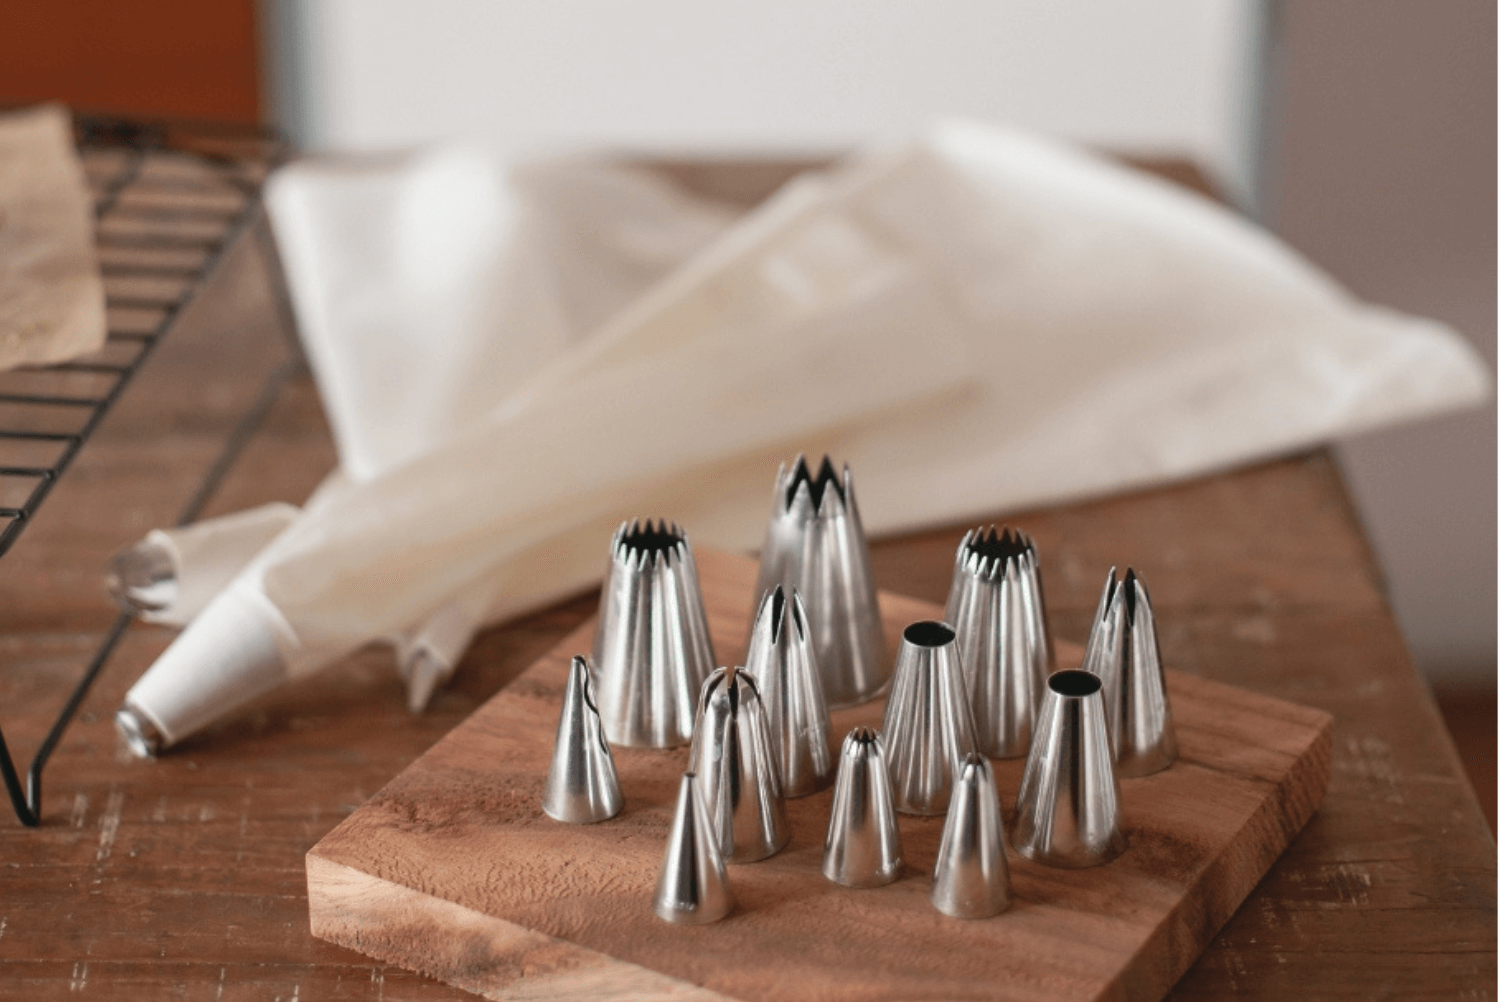
What Are Piping Tips and How Do They Work?
So, what exactly are piping tips? Essentially, they’re handy little tools that let you create a wide array of beautiful designs with frosting. Think of them as the paintbrush for your edible artwork. By attaching the best piping tips to the end of a piping bag filled with frosting or icing, you’re ready to turn your desserts into a masterpiece!
Now, how do they work? It’s actually quite simple. The shape of the opening on the tip determines the design you get when squeezing out the frosting. Round tips make lines and dots, star tips create those lovely swirls, and petal tips are perfect for—you guessed it—flower petals. Choosing the best piping tips can really make a difference in achieving the exact look you’re going for.
Different Materials Used in Piping Tips (Metal vs. Plastic)
Let’s talk materials. You’ll find both metal and plastic piping tips available. I’m a big fan of metal tips—they’re durable, withstand pressure from thicker frostings, and many of the best piping tips are metal. I’ve had some of my metal tips for years, and they’re still going strong! But plastic tips have their perks too: they’re affordable and great for beginners experimenting with different designs.
I once made the mistake of using a plastic tip with really stiff royal icing. Big mistake—the pressure was too much, and the tip actually cracked, resulting in a frosting mess. So when it comes to tougher jobs, reach for the best piping tips made of metal for a hassle-free experience!
The Importance of Tip Size and Shape in Cake Decorating
Choosing the best piping tips can make all the difference in achieving the look you want for your cake. The size and shape of your piping tip play a huge role: larger tips are perfect for covering big areas quickly, like when frosting an entire cake, while smaller tips allow for precision and control in detailed work. I learned this firsthand when I attempted to write “Happy Birthday” with a giant tip—let’s just say it wasn’t the elegant look I was going for!
In terms of shape, round tips are your best bet for writing and creating clean lines. Star tips add those beautiful, textured patterns that make cakes stand out, and petal tips are essential for crafting lifelike flowers. These are some of the best piping tips to start with if you’re just getting into cake decorating.
When I first began experimenting with different piping tips, my kitchen looked like a frosting war zone, but the time spent practising was absolutely worth it. There’s nothing like the satisfaction of finally creating the perfect rose or mastering an intricate border.
One of the most valuable lessons I’ve learned is to experiment and have fun! Some of my favourite designs have come from happy accidents or discovering unique effects by combining different tips. And here’s a bonus pro tip: invest in a tip-cleaning brush. Cleaning dried frosting out of the best piping tips with a toothpick is far from enjoyable!
Choosing the Best Piping Tips for Your Cake Design
I remember when I first started out, I thought I could use any old tip for everything. Boy, was I wrong! I tried to pipe roses with a round tip once, and let’s just say it looked less like a garden and more like a blob convention. Choosing the best piping tips can make all the difference, helping your designs go from messy to masterpiece. Live and learn, right?
Matching the Best Piping Tips to Specific Decorating Techniques
Matching piping tip shapes to specific decorating techniques is crucial. It’s like picking the right tool for the job. You wouldn’t use a hammer to screw in a lightbulb, would you? Same goes for piping tips. For writing messages, you’ll want a round tip. To create fancy flowers, the petal tip is your best friend.
I once spent hours trying to create a basketweave pattern with a star tip. Talk about frustrating! It wasn’t until my neighbour pointed out I was using the wrong tip that I realized my mistake. Swapped it out for a basketweave tip and voilà! The best piping tips really make all the difference, turning tricky designs into something manageable.
Considerations for Different Types of Frosting and Icing
Now, let’s chat about frosting types. This is something I learned the hard way. Ever tried to pipe stiff royal icing through a fine tip? It’s like trying to squeeze concrete through a straw. Not fun at all.
Different frostings need different tips. Buttercream? It’s pretty versatile, but it can be a bit heavy. I prefer larger tips for buttercream to avoid hand cramps.
Whipped cream, on the other hand, is super light and airy. It needs bigger tips, or it’ll just melt into a sad puddle. I found this out when I tried to pipe delicate flowers with whipped cream. By the time I finished, it looked more like a melted snowman than a bouquet.
Royal icing is great for fine details, but you have to use the right tips. I once tried to use a big star tip with royal icing. It was like trying to paint the Mona Lisa with a broom.
And don’t even get me started on combining multiple tips for complex designs. This is where the magic happens! It’s like being a frosting DJ, mixing and matching to create your own unique design.
I remember the first time I combined a petal tip for flowers with a leaf tip for, well, leaves. It was like a lightbulb went off in my head. Suddenly, my cakes weren’t just decorated – they were little edible gardens!
Here’s a pro tip: practice combining tips on a piece of parchment paper before you go to town on your cake. It’s saved my bacon more times than I can count. Plus, you get to eat the practice frosting. Win-win, if you ask me!
Essential Tools to Pair with Your Piping Tips
Piping Bags: Disposable vs. Reusable Options
Now, you’ve got two options here: disposable or reusable bags. Disposable ones are great for beginners or if you’re as lazy about cleaning as I used to be. Just use ’em and toss ’em! But let me tell you, the guilt of all that plastic waste started to weigh on me.
So, I switched to reusable bags. They’re tougher and can handle stiffer frostings without bursting. But cleaning them? Ugh.
Couplers for Easy Tip Swapping
These little plastic gadgets are game-changers. They let you swap out tips without having to empty your piping bag. I can’t tell you how many times I’ve been elbow-deep in decorating, realised I needed a different tip, and thanked my lucky stars for couplers.
I remember this one time when I was working on a beach-themed cake. I had my bag all loaded up with blue frosting for the ocean. Halfway through, I realised I needed a different tip to make better waves. Without a coupler, I would’ve been up the creek without a paddle (or should I say, up the beach without a surfboard?). But with my trusty coupler, it was fast and easy.
Tip Cleaning Brushes and Storage Solutions
Now, let’s talk about cleaning. Cleaning piping tips is about as fun as watching paint dry. But it’s got to be done unless you want your next cake to taste like stale frosting. Ick.
Then I discovered tip cleaning brushes. Holy frosting, Batman! These things are lifesavers. They get into all the nooks and crannies, making cleaning a breeze.
One time, I forgot to clean a star tip after using it with red frosting. Fast forward a week, and I’m trying to pipe white rosettes on a wedding cake. Surprise! They came out pink.
Lastly, storage solutions. When I first started, I kept my tips in an old shoebox. Bad idea. They’d roll around, get bent, and I could never find the one I needed. It was like playing 52-pickup but with tiny metal cones.
I invested in a proper tip organiser, and it was like the heavens opened up and the cake gods smiled down on me. Everything has its place now. No more bent tips, no more frantic searching.
Mastering Basic Piping Techniques with the Best Piping Tips
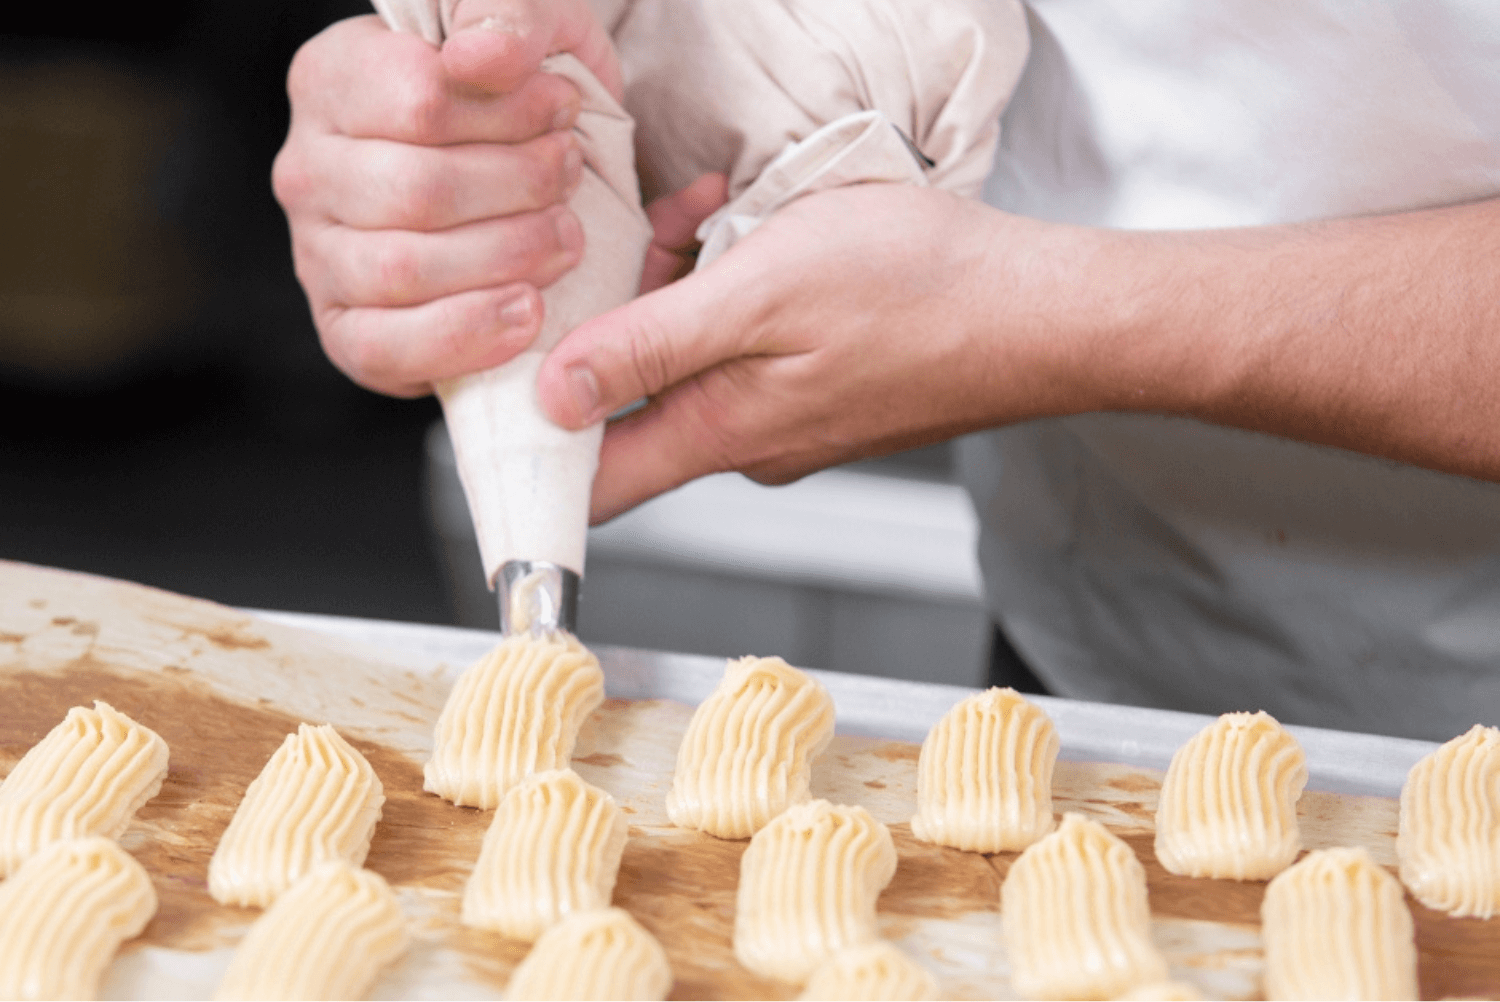
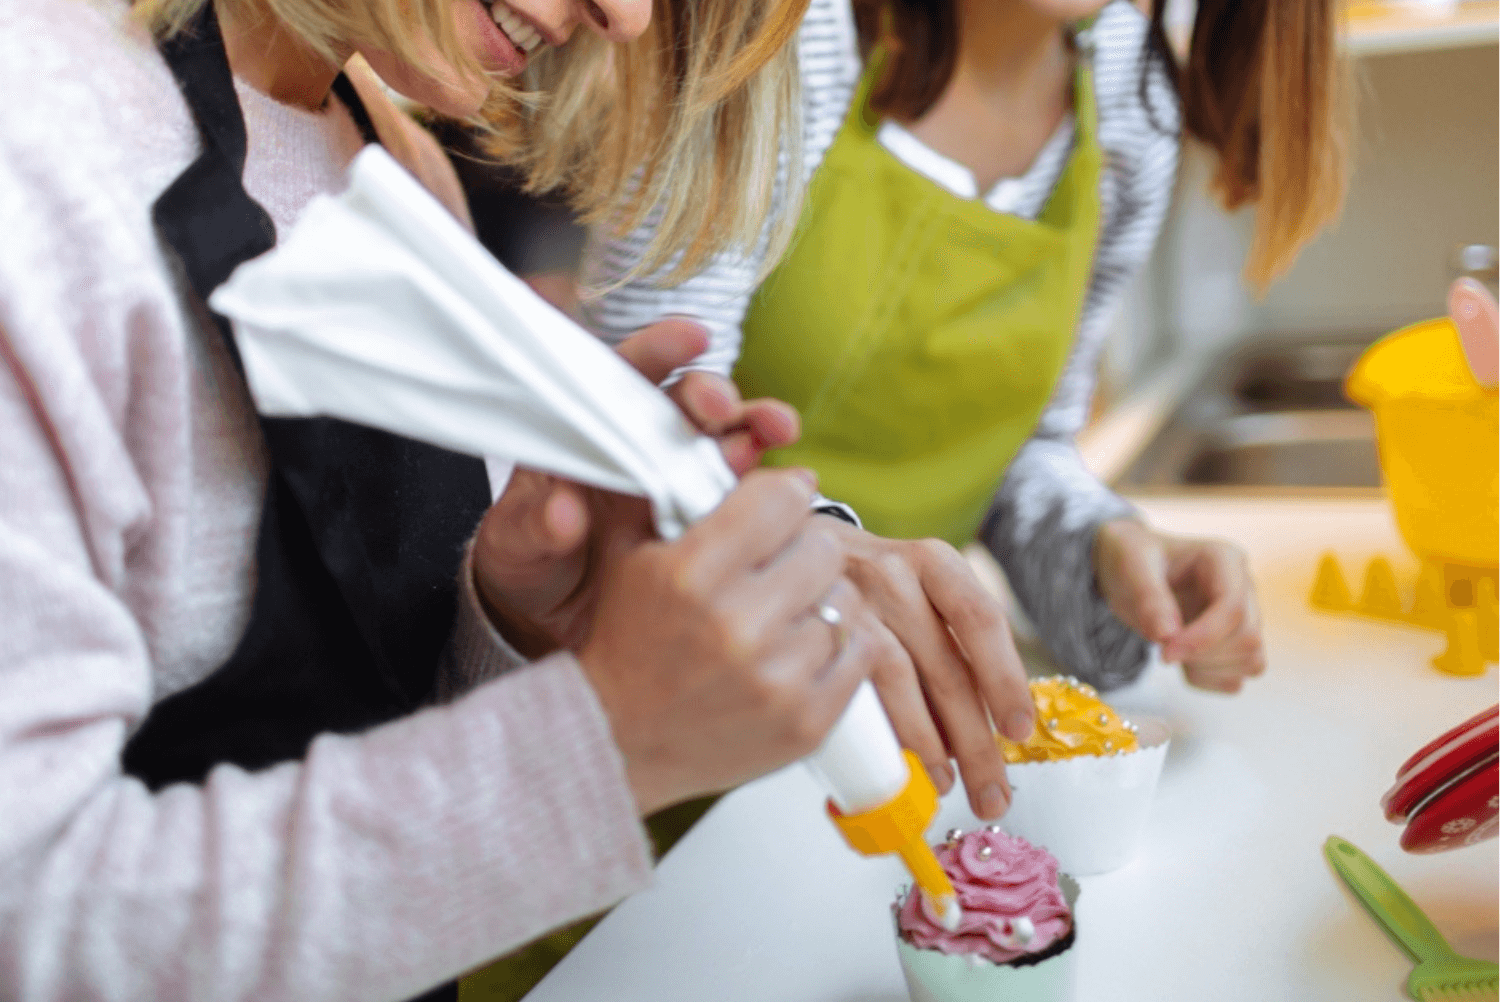
Proper Grip and Pressure Control
When starting out, mastering grip and pressure control is essential for beautiful designs. One thing I learned early on is that the right grip can make all the difference, especially when working with the best piping tips. At first, I gripped the piping bag too tightly, but soon realized that a gentle hold, like cradling a delicate bird, yields better results. My dominant hand now guides the tip, while my other hand applies steady pressure from the top.
Finding the “just right” amount of pressure is crucial for achieving consistent results, especially if you’re using the best piping tips. Too much pressure can turn a perfect rosette into a squished mess, while too little pressure leads to wimpy, inconsistent lines. Practising on parchment paper helped me gain control over my pressure, and it’s a trick I still use whenever I try out a new piping technique.
Practice Exercises for Beginners
When I first started, I skipped basic exercises in favour of elaborate designs, which was a mistake. Now, I recommend starting with simple lines and dots. This may sound repetitive, but it’s foundational when learning to handle the best piping tips. Practising shapes like stars and shells not only builds confidence but also ensures a steadier hand and smoother results.
Common Mistakes to Avoid When Piping
One common error is using frosting that’s too soft or too stiff. The best piping tips work wonders, but they’re only as good as the consistency of the frosting they’re paired with. Another mistake is moving the piping bag too quickly, which results in shaky, uneven lines. Finally, always check for air bubbles and make sure to wipe your tip frequently. A clogged tip can turn an intricate design into one big frosting blob!
Advanced Piping Techniques for Show-Stopping Cakes
Creating 3D flowers and figurines is where the best piping tips really shine. Building designs in layers and practising on a flower nail before going directly onto the cake are essential steps. I spent countless hours studying tutorials on using different tips to create intricate floral designs.
Lace and Filigree Work with Fine Tips
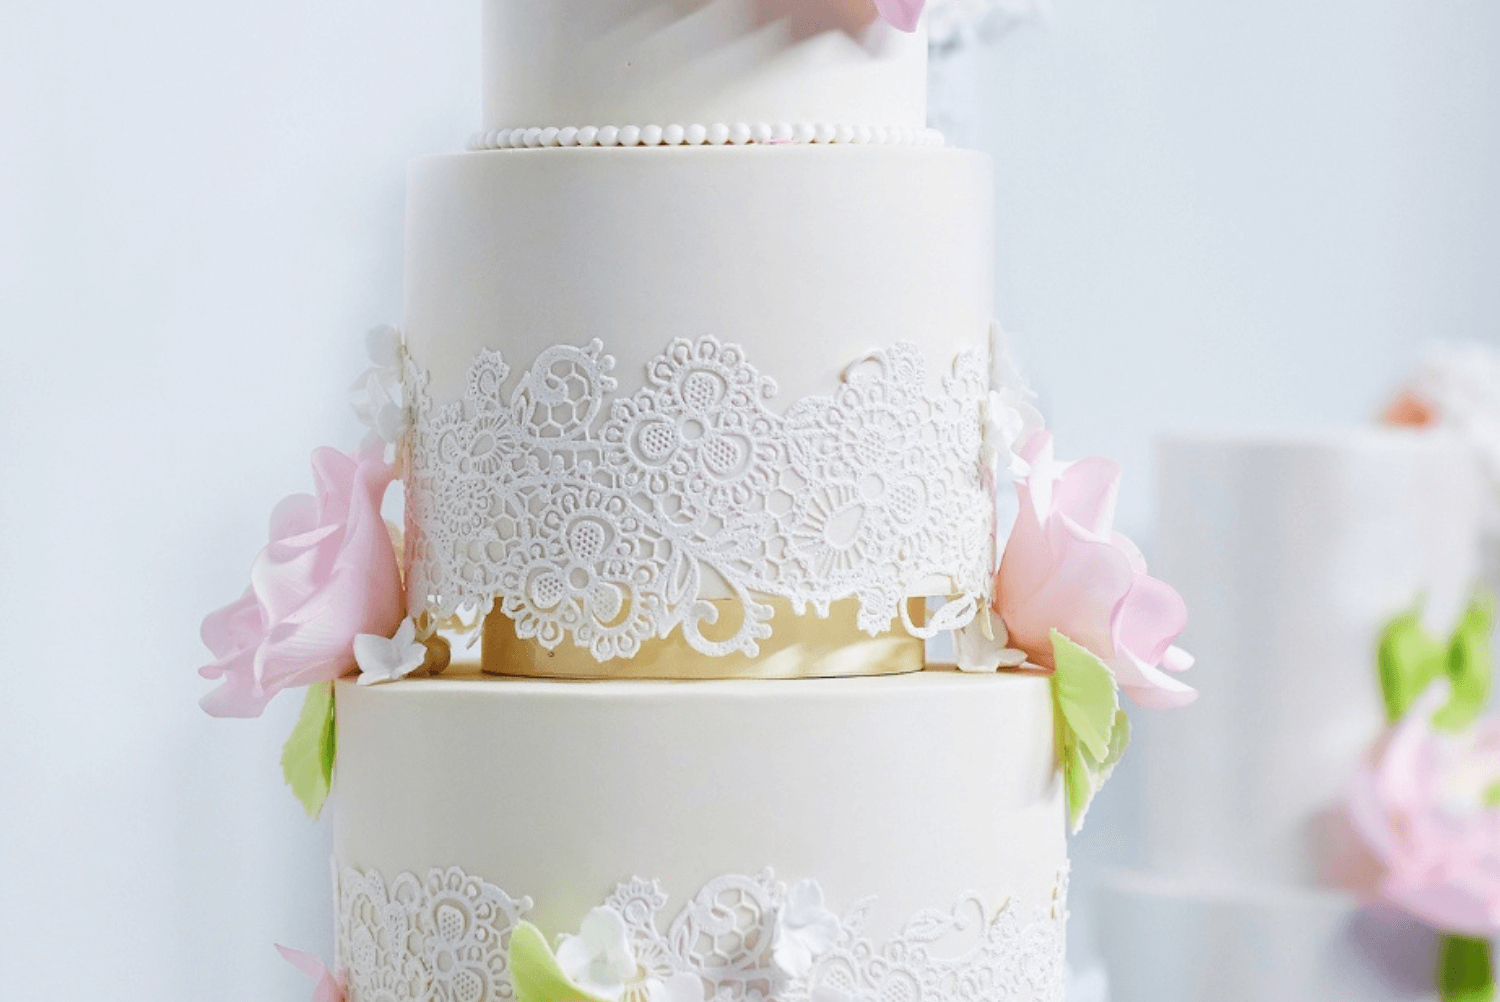
Now, let’s talk lace and filigree work. This is where those fine tips really earn their keep. The first time I attempted piped lace, it looked like a drunken spider had tap-danced across my cake. Not quite the elegant look I was going for!
The trick is to sketch your design lightly on the cake first. I use a food-safe marker or just gently score the fondant. And for the love of all things sweet, don’t rush it!
Airbrushing and Painting on Piped Designs
Airbrushing and painting on piped designs? Now we’re really getting fancy!
Start with simple techniques like shading your piped flowers. Once you’ve got that down, you can move on to more complex designs. I once airbrushed a galaxy design on a piped constellation cake. It looked amazing… after my third attempt. The first two looked more like a tie-dye experiment gone wrong!
Painting on piped designs is another game-changer. But a word to the wise: make sure your piped design is completely dry first.
Remember, these advanced techniques take time to master. Don’t get discouraged if your first attempts look more like abstract art than elegant cake decorations. Even the pros have their off days.
Practice on Styrofoam dummies, parchment paper or flower roses before you tackle real cakes. It’s cheaper, and you won’t be tempted to stress-eat your mistakes.
Just remember: patience, practice, and a good sense of humour will get you through even the toughest cake challenges.
Whew! We’ve just whipped through the crème de la crème of piping tips, and I don’t know about you, but I’m feeling pretty inspired to go decorate a cake right now! Remember, mastering the art of cake decorating is all about practice, patience, and having the best cake decorating tools at your fingertips.
With these 10 best piping tips in your decorating kit, you’re well on your way to creating cakes that’ll make jaws drop and taste buds dance. So, what are you waiting for? Grab those tips, whip up some frosting, and let your creativity flow! Who knows? Your next cake might just be your sweetest masterpiece yet. Happy piping, decorators!

About the Author
Kaylene Grieve, a passionate baker and culinary educator, carries on a rich family legacy in the world of pastries and confections that began with her grandfather’s successful bakery. With over two decades of experience in business and marketing, Kaylene combines her baking heritage with digital expertise as the founder of Bake Batter & Beyond. This comprehensive baking resource reflects her mission to make the joy and science of baking accessible to all.
Dedicated to empowering both novice and experienced bakers, Kaylene’s website offers practical knowledge and tools including measurement converters, substitution guides, troubleshooting tips, and baking rescue techniques. Her special focus on the intricate world of cake making, coupled with her unique blend of family tradition and modern savvy, has established Kaylene as a trusted voice in the baking community.

0 Comments